Build a Real-time Collaborative Whiteboard in NextJS With Supabase & Stream Video
2 years ago
49 mins readReal-time applications are known to be complex and require a lot of expertise before bringing them to life. In this article, we're going to take a look at building a real-time collaborative whiteboard with video and live presence functionalities using NextJS, Supabase, and Stream Video React SDK.
What is a Collaborative Whiteboard?
A collaborative whiteboard is an online whiteboard tool that allows multiple people to draw content simultaneously in real-time. It provides the following features:
Multiple users: Multiple people can access the same whiteboard at the same time from different devices.
Real-time collaboration: As one person draws or types on the whiteboard, all other participants see the changes instantly.
Drawing tools: Users typically have access to pens to annotate and draw content on the whiteboard.
Sharing: The whiteboard can be shared via a URL link so that only invited participants can access it.
Video stream: Each collaborative whiteboard will have a live video stream for users to see and speak to one another in real time while drawing.
Demo - What We'll Build
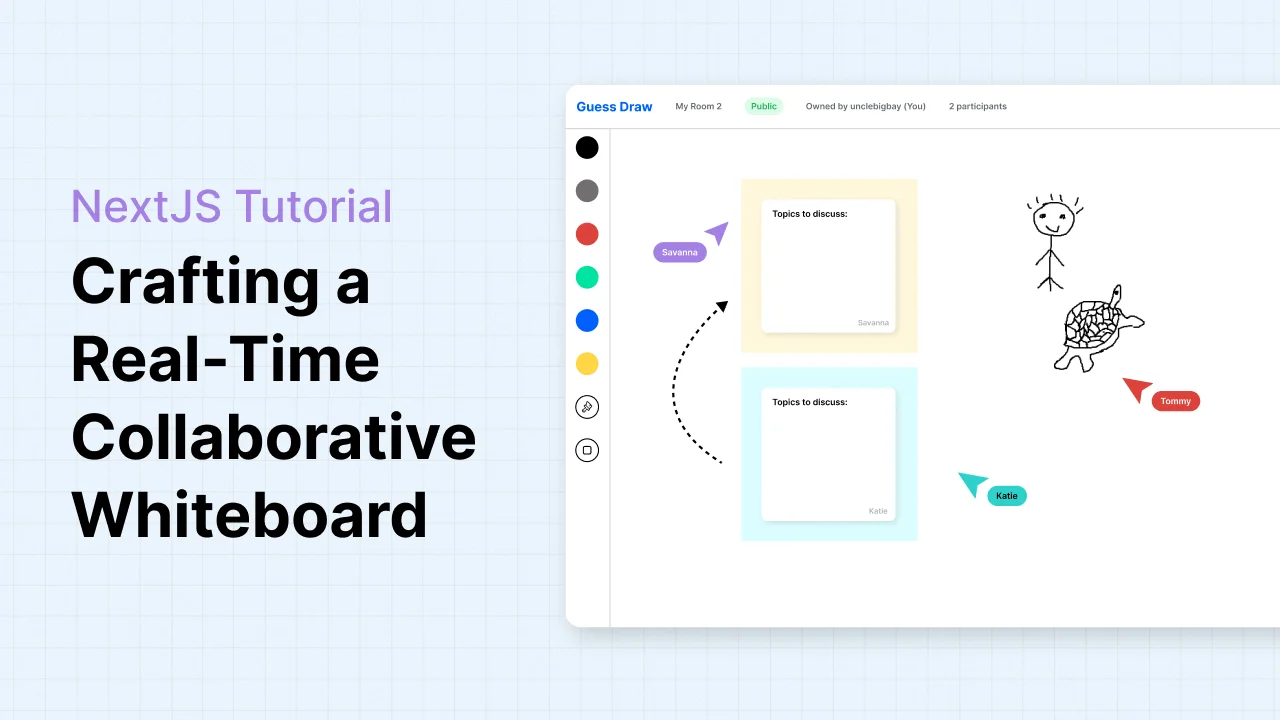
Below is what our real-time whiteboard with video feature will look like at the end of this tutorial article.
Below is a brief demonstration of how our application will operate upon the completion of this tutorial article.
Developer Setup and Prerequisites
This article assumes that you have at least a working experience using JavaScript, and React, and you know what the term component, props, useStates, useEffect, and hooks means.
Before you continue with this tutorial, make sure you have Node.js installed and Node package manager (npm) set up on your device. We’ll use npm specifically for this tutorial.
We’ll also use the technology stacks listed below to build our chat application:
NextJS for frontend and backend.
TypeScript for codebase type safety.
Supabase real-time, passwordless authentication and database.
Stream’s React Video SDK to power our video feature.
Tailwind CSS for styling our layouts and components.
What is Supabase?
Supabase is an open-source backend-as-a-service platform that offers services such as access to the PostgreSQL database, real-time APIs, magic link authentication, edge functions, file storage, auth services, etc. We're going to utilize some of the Supbase features such as:
PostgreSQL database
Magic link
Real-Time
What is Supabase Magic Link
Magic link authentication is a secure passwordless authentication method where users receive a one-time link (the "magic link") via email or SMS to log in to an application.
Here are the main steps:
Step 1: A user enters their email address or phone number to log in.
Step 2: The application generates a unique link with a token and sends it to the user's email address or phone number.
Step 3: The user clicks on the magic link in the email or SMS.
Step 4: When the user clicks the link, the token in the URL is validated by the application.
Step 5: If the token is valid, the user is logged in and the token is invalidated.
What is Supabase Real-Time
Supabase Real-Time is an incredibly robust and dynamic feature that enables active monitoring and listening for any modifications or updates occurring within a PostgreSQL database on Supabase.
This feature is particularly useful for applications that require instant updates or notifications, such as messaging platforms, collaboration tools, or live data dashboards. With Supabase Real-Time, developers can create more responsive and interactive experiences for their users, ultimately enhancing the overall efficiency and effectiveness of their applications.
We'll leverage the Supbase Real-Time functionality to build our real-time drawing feature, ensuring users on a collaborative board are always seeing and working on the most current drawings.
Setting Up Your Supabase Account
Follow the steps below to create your Supabase account for free.
Step 1: Go to the Supabase
Step 2: Click on the "Continue with GitHub" button or any other log in options
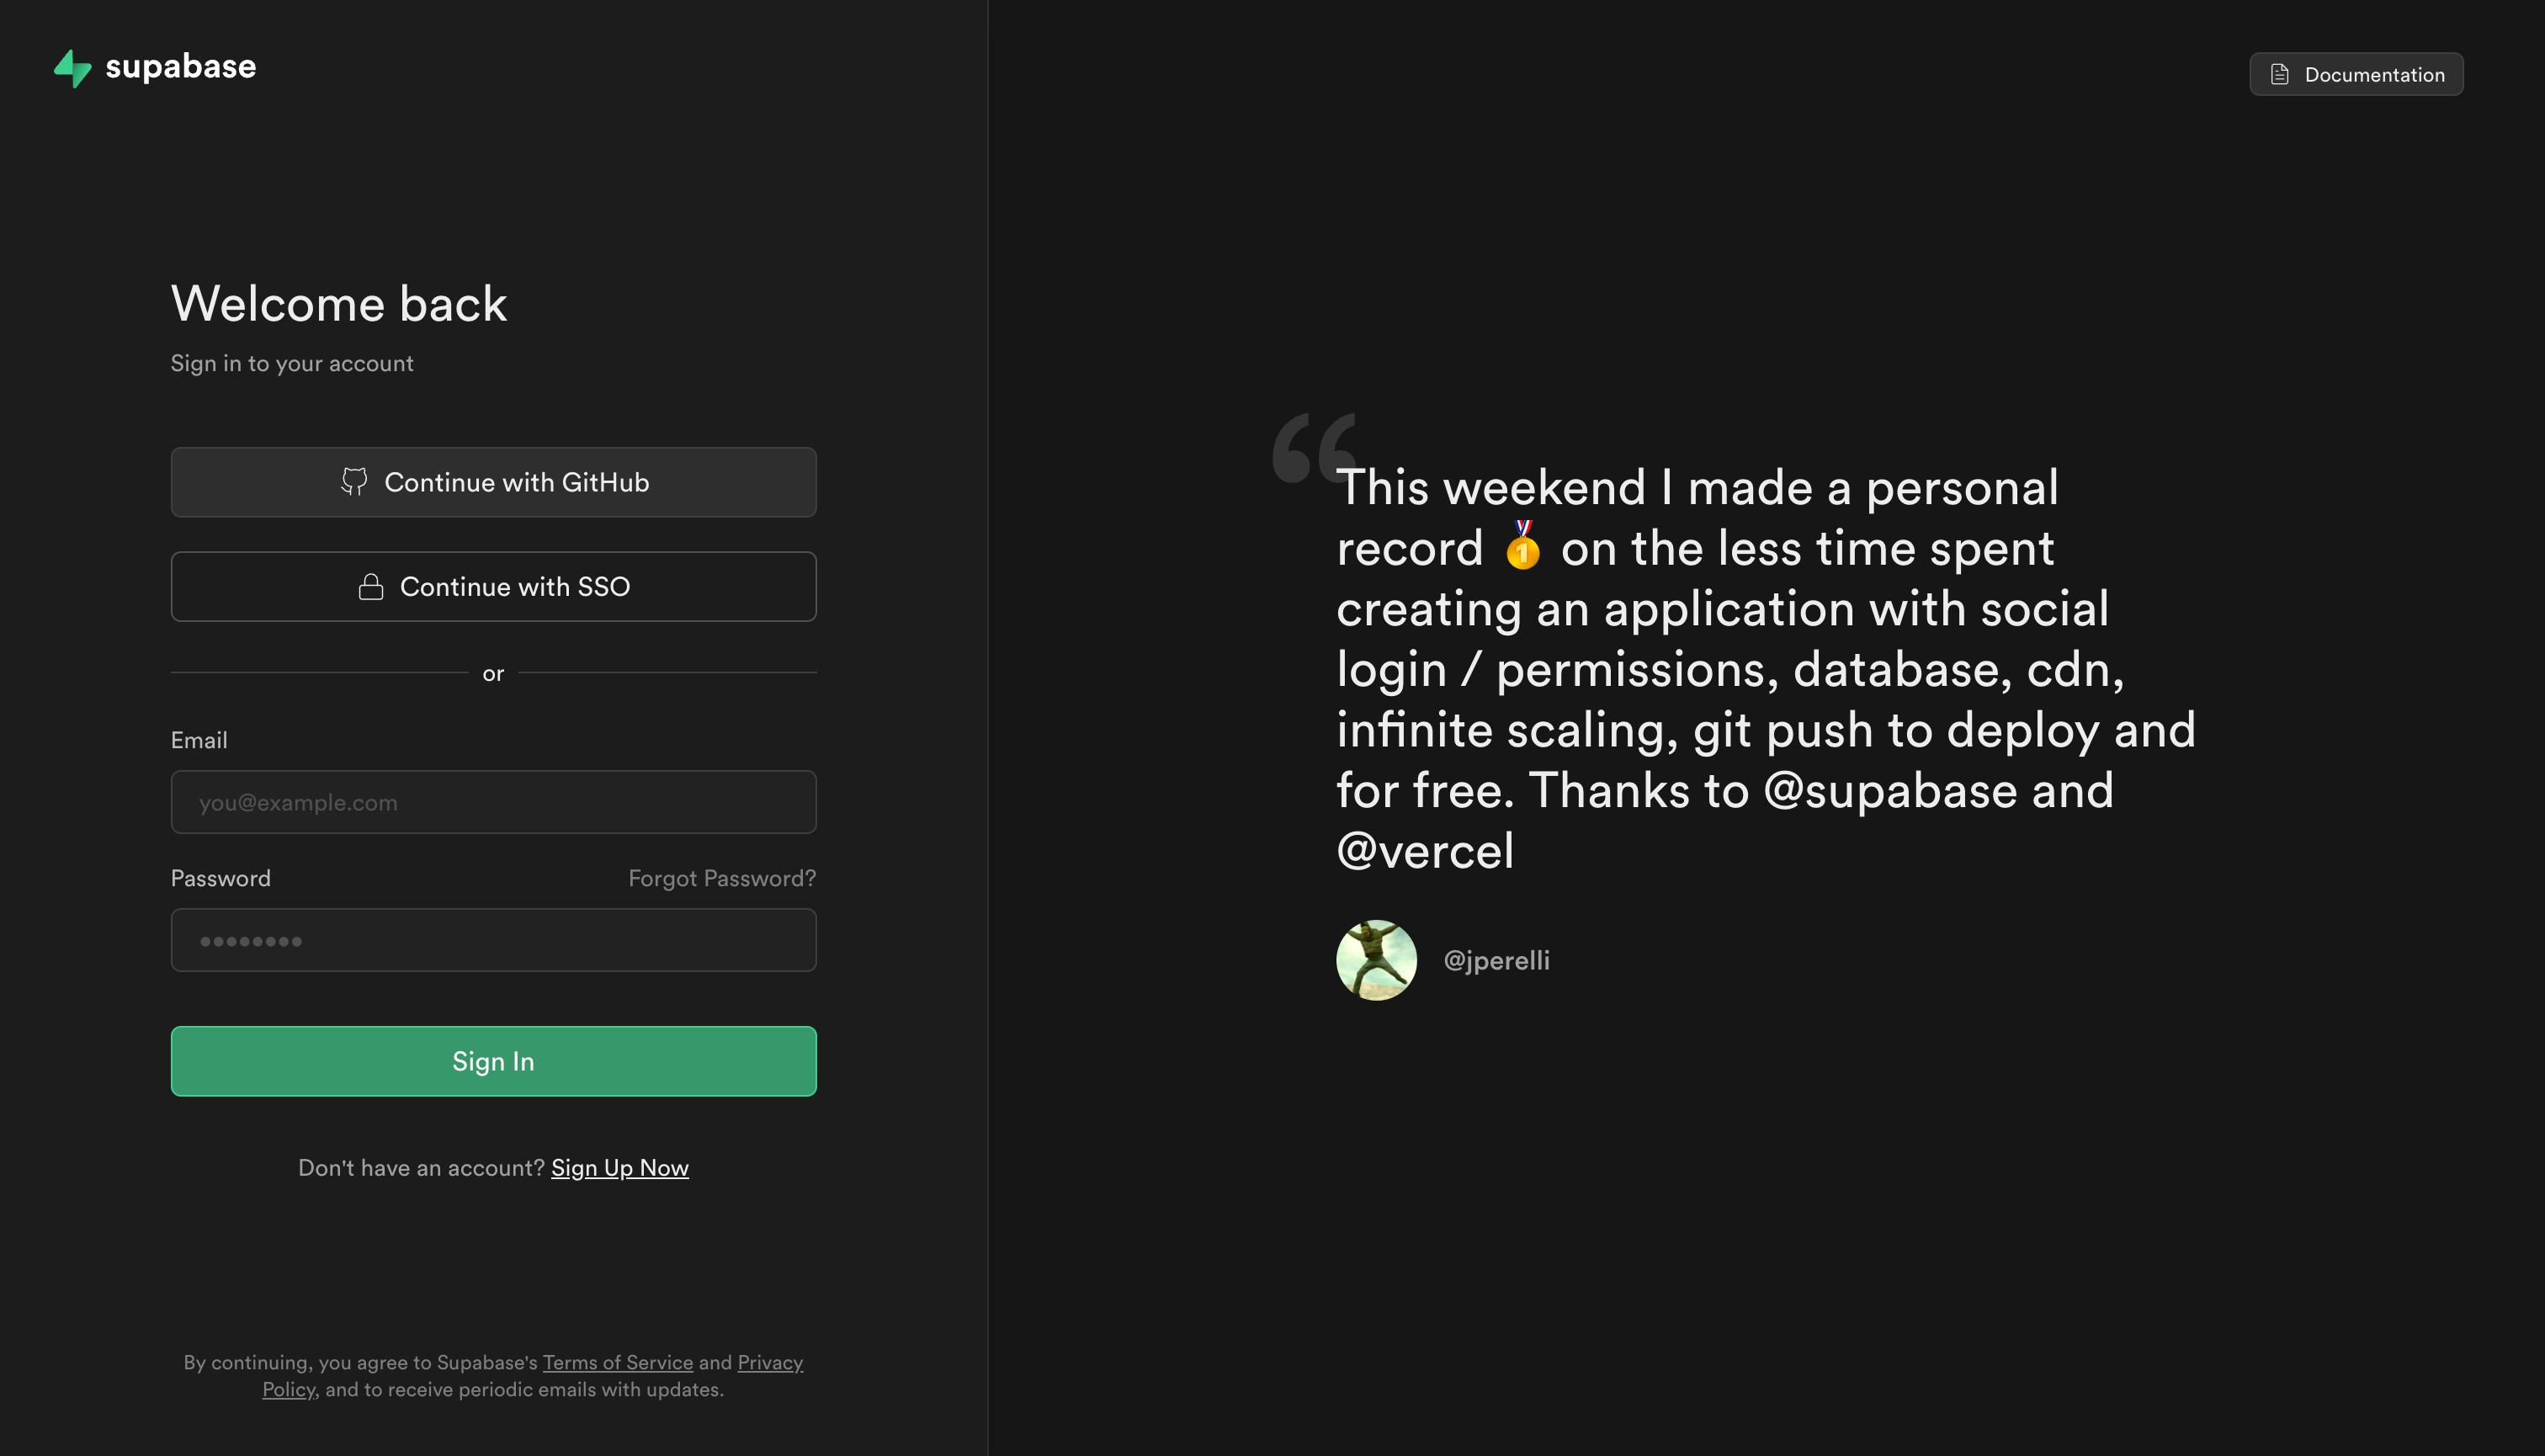
Step 3: If you’re signing in for the first time, follow the GitHub authorization step to complete your signup process.
Creating a New Supabase Project
Once you've signed in, you'll need to create a new Supabase project for your application.
Follow the steps below to create a new Supabase project:
Step 1: Go to your dashboard and click on the "New Project" button as shown below.

Step 2: Select the default organization created with your GitHub username (mine was unclebay143).
Step 3: Fill in the required project information (for this example, the project name is multi-user-white-board-app).
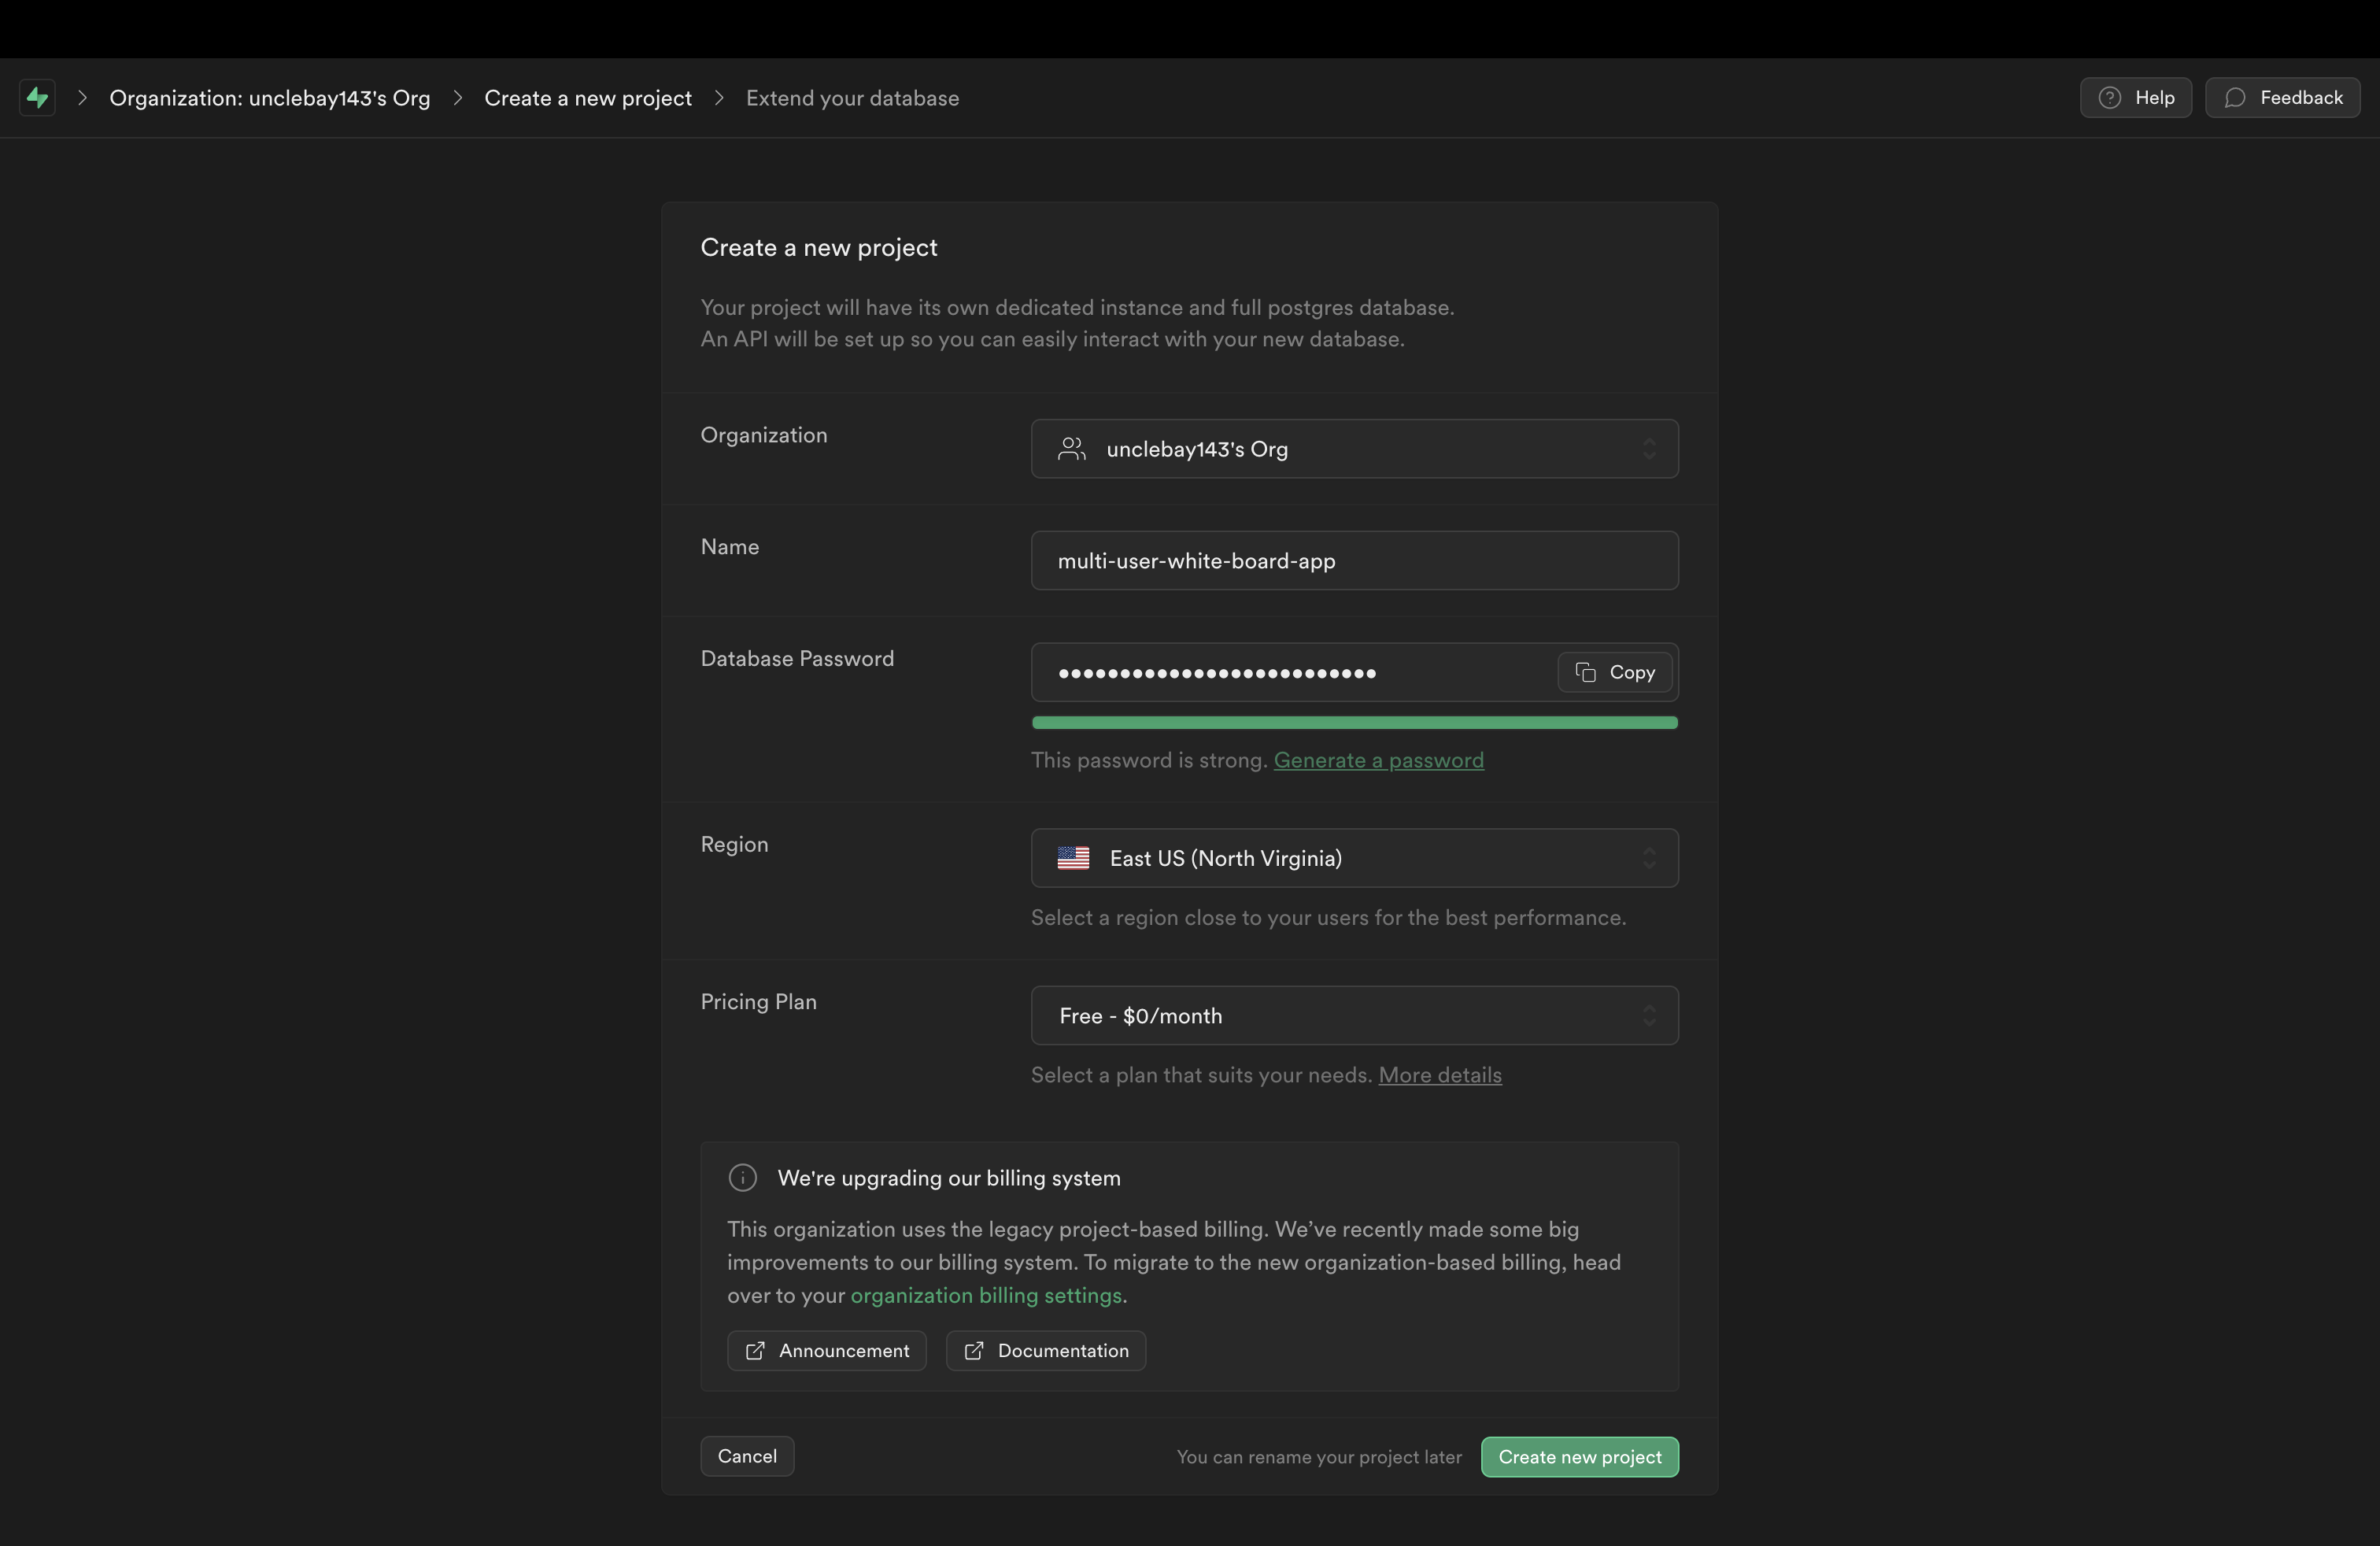
Step 4: Next, create a secure password and select the region server nearest to your location for the best performance.
Step 5: Finally, click on the "Create new project" button when you’re done and wait for Supabase to complete setting up your new project.
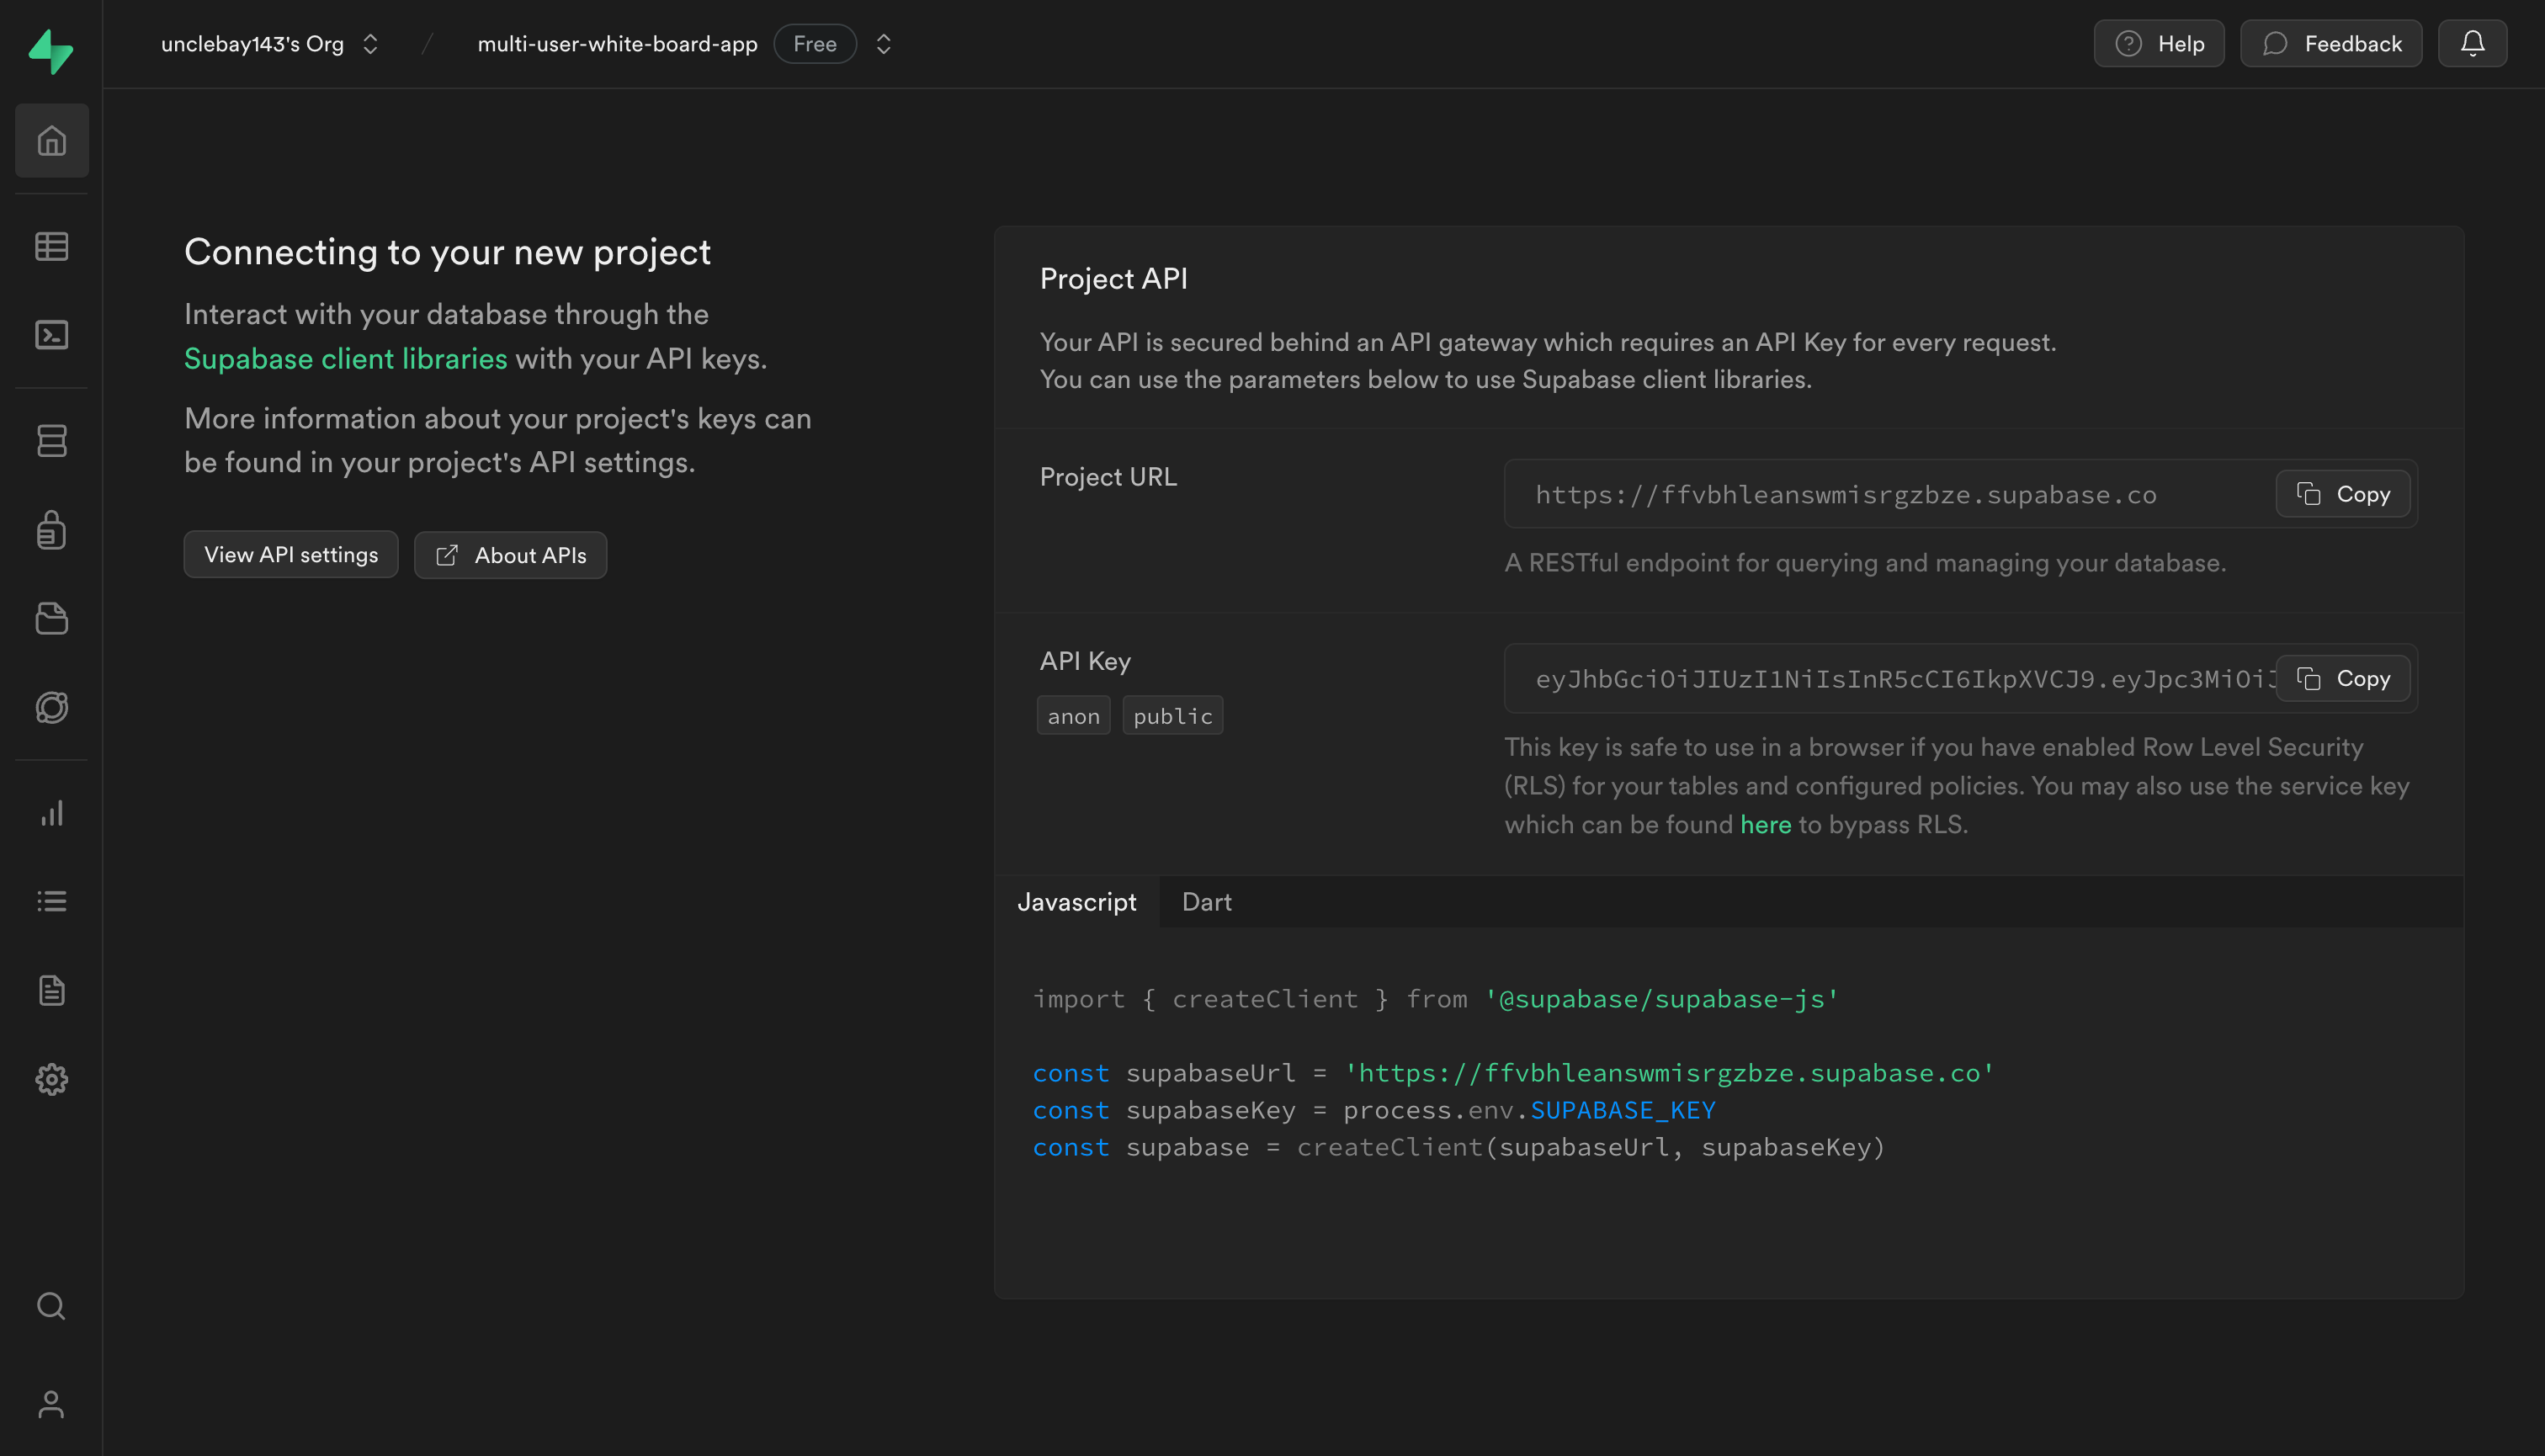
Getting Your Supabase API Keys
When Supbase has completed setting up your project, you will get your Project API Keys keys (the anon/public key and the service_role/secret key). We’ll be using these keys along with the project URL to interact with our Supabase project later.
Locate the Connecting to your new project section and copy your API keys to a safe place for reference - we'll use it later while setting up our project frontend.
You can also navigate to your project settings to view the full API keys, including the service role key as shown below.

Setting Up the Supabase Database Schema
Next, we'll set up our drawing room database schema. This is where our app’s drawing room data will be stored and accessed.
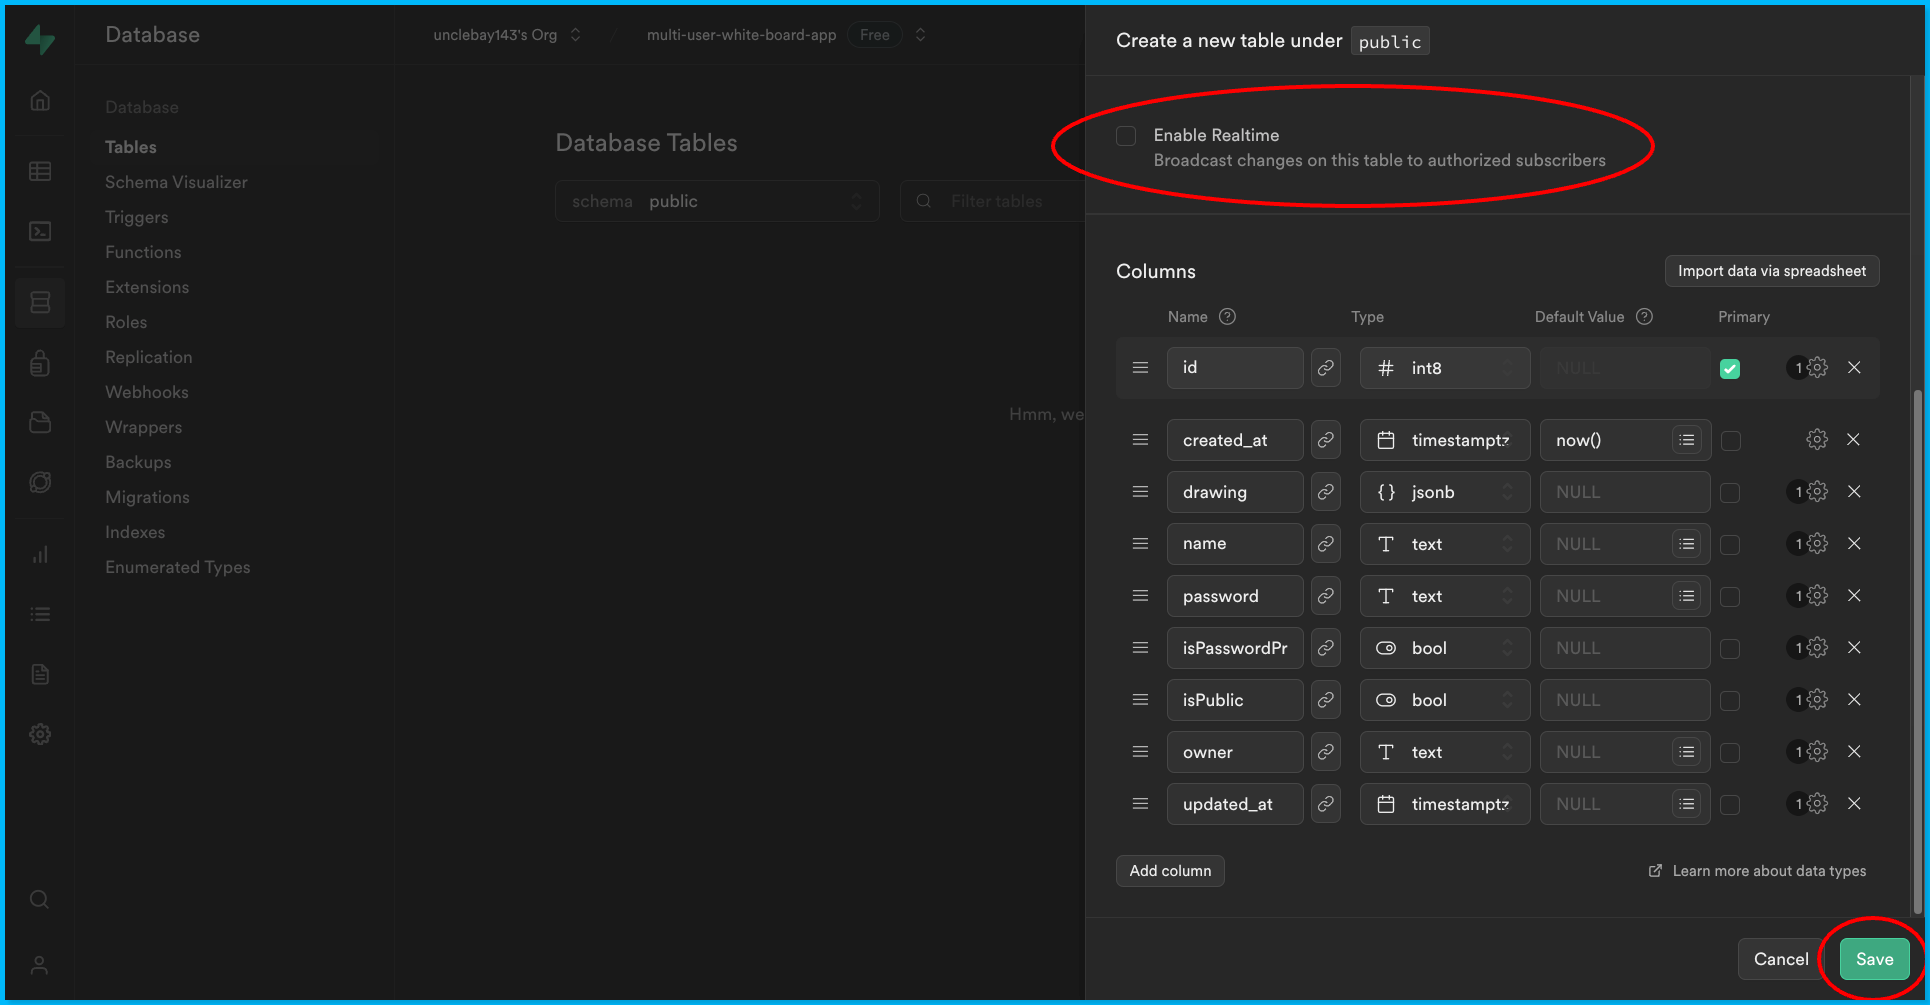
Navigate to the database dashboard and click on the 'New table' button on the tables page as shown below.

Fill the fields in the provided forms with the following details.
Name: drawing-rooms
Enable Row Level Security (RLS): Disable it for this tutorial
Table columns:
| Name | Type |
| id | uuid |
| created_at | timestamptz |
| drawing | jsonb |
| name | text |
| password | text |
| isPasswordProtected | bool |
| isPublic | text |
| owner | text |
| updated_at | timestamptz |
Finally, enable the real-time option and click the 'Save' button when you're done.
What is Stream Video?
Stream is a robust and reliable chat, audio, and video platform that allows you to integrate real-time visual and audio features into your application through their easy-to-use SDKs.
We're going to use the Stream Video React SDK to build an in-app video calling feature into our real-time collaborative whiteboard.
Setting Up Your Stream Account
To add the video feature to your app, you need to sign up for a free 30-day trial account.

Setting Up Your Video Project
After successfully creating your Stream account, you need to set up an app for your project.
Follow the steps below to create a new video app and get your access keys:
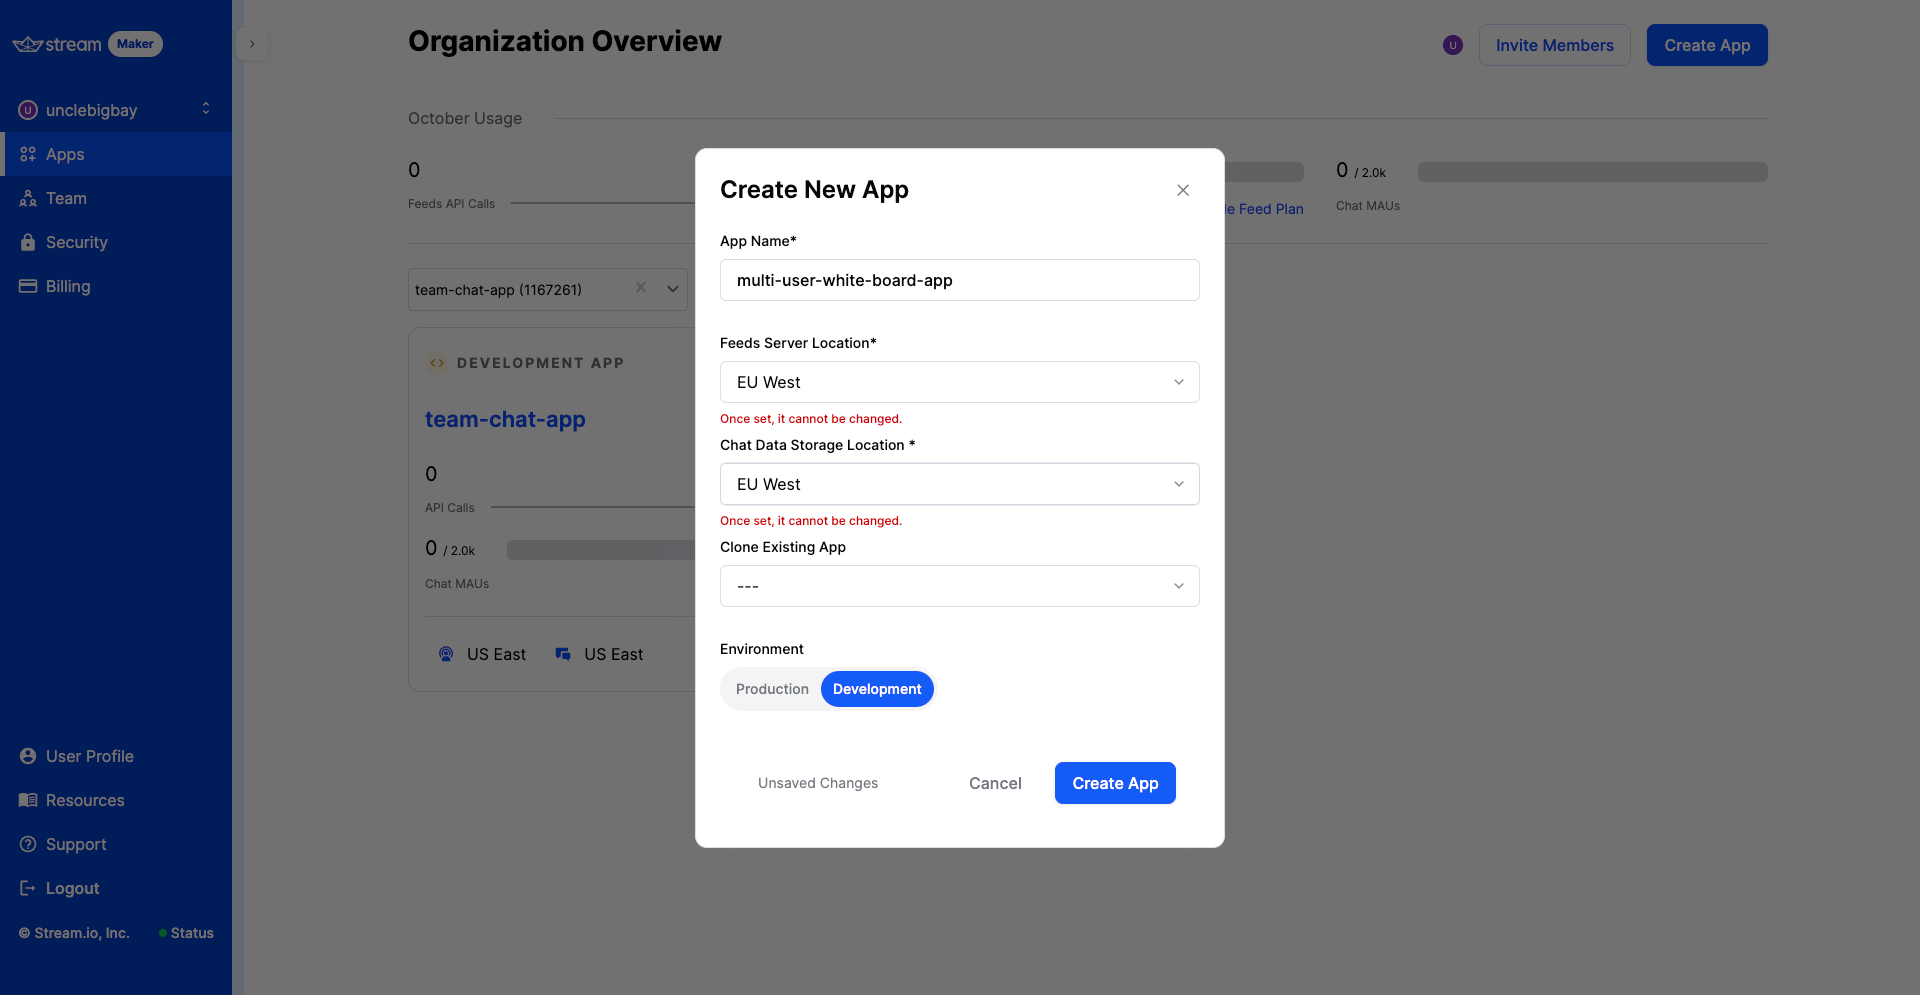
Step 1: From your dashboard, click on the "Create App" button.

Step 2: In the pop-up form, enter your video app’s name (we’re using 'multi-user-white-board-app' for this tutorial).
Step 3: Select the closest location to your region for the best performance (this is where your chat app will be hosted) and leave the environment as Development.
Step 4: Click the Create App button when you’re done. You will be redirected to your new chat app’s dashboard.
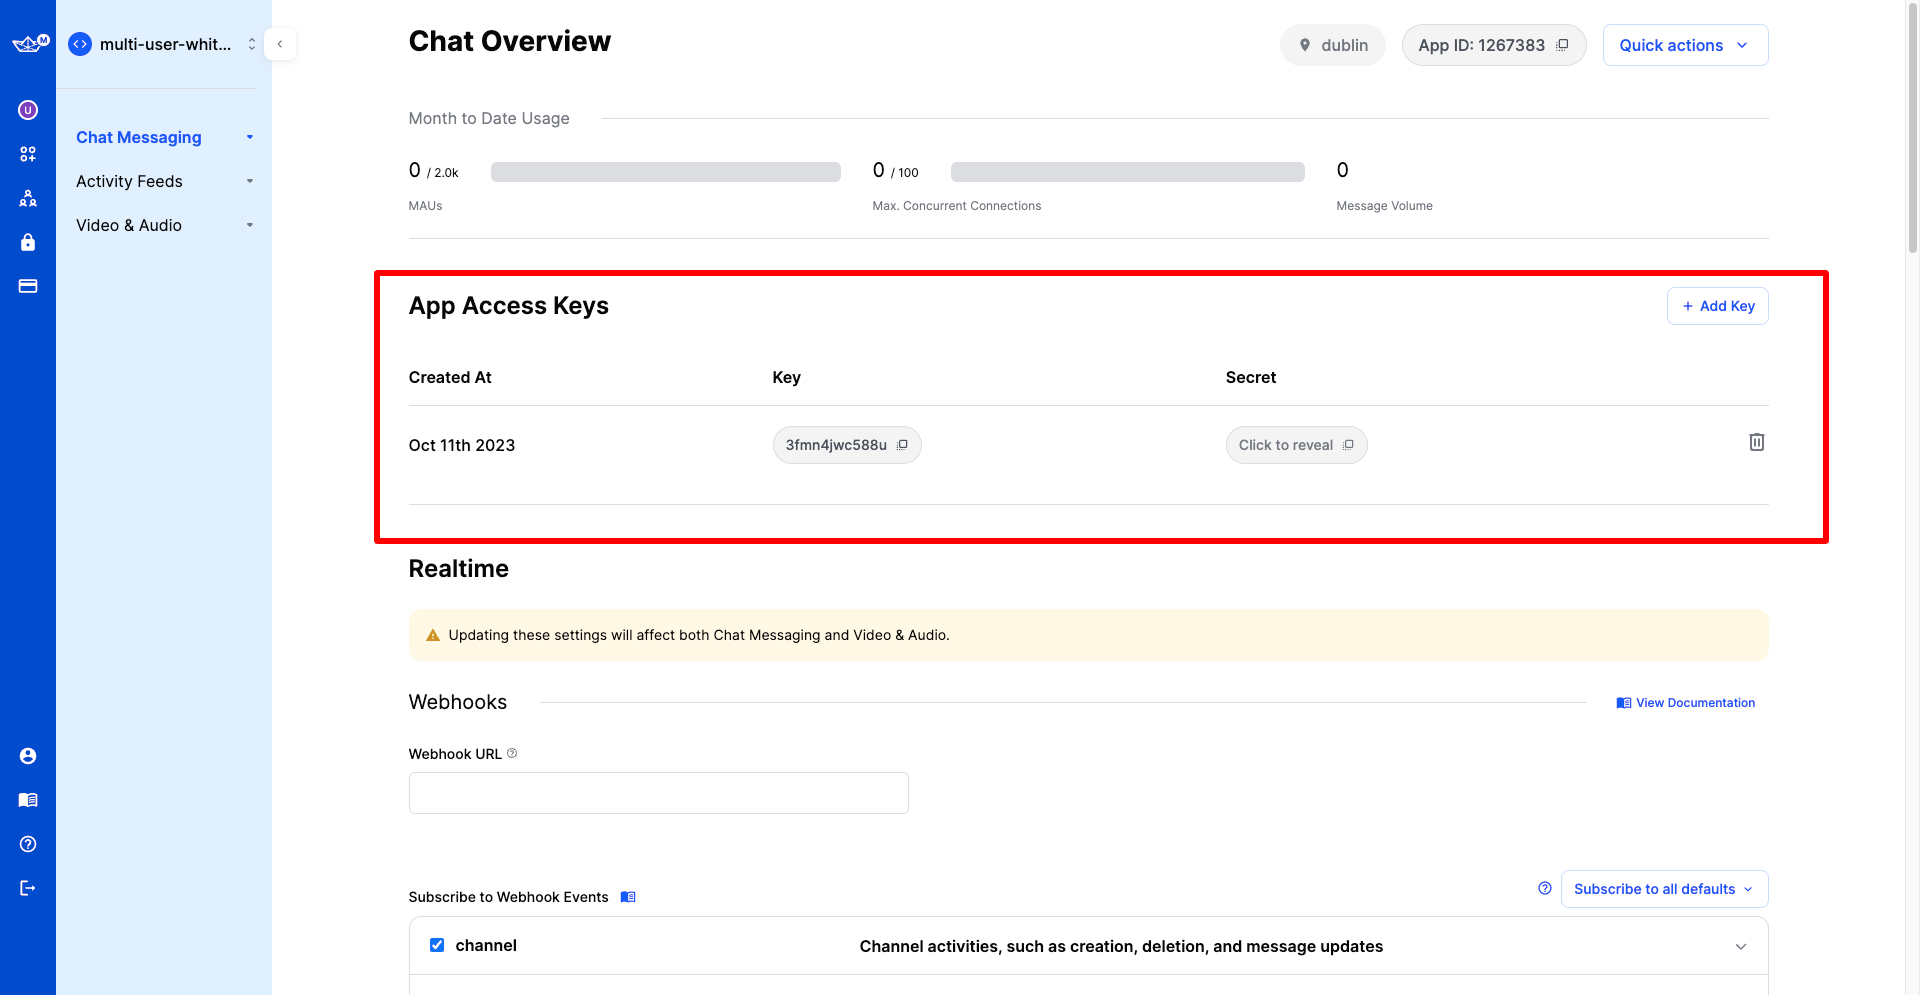
Step 5: Locate the 'App Access Keys' section on the page. We’ll use these keys to build the frontend and backend parts of our video feature.
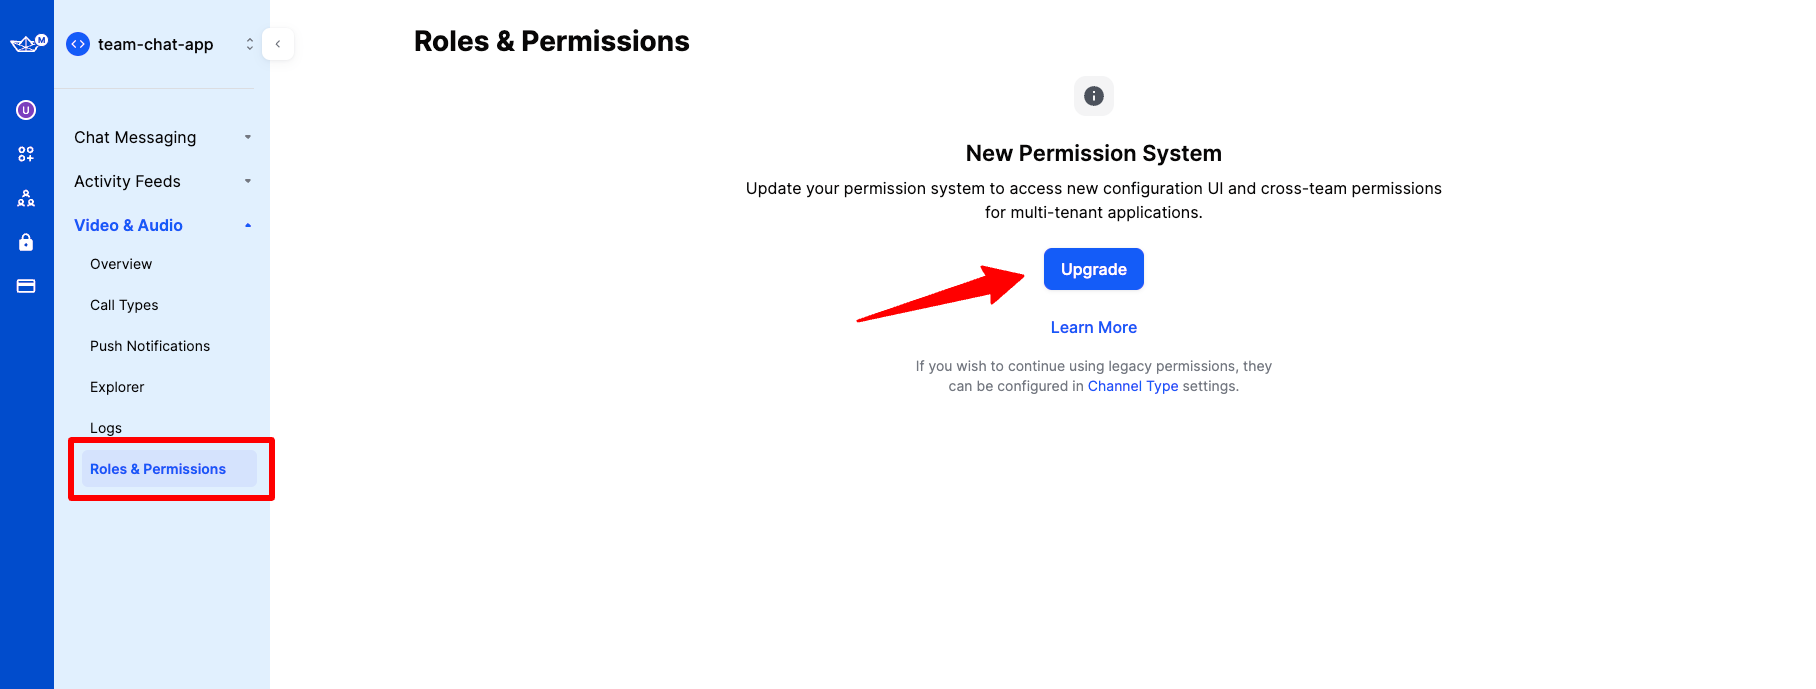
Enabling Advanced Permission Dashboard
If you have an old app on Stream, you should consider upgrading to the new permission system for free.
Bootstrapping NextJS App
Since we’re using NextJS, let’s set up the front end of our chat application using the NextJS CLI command.
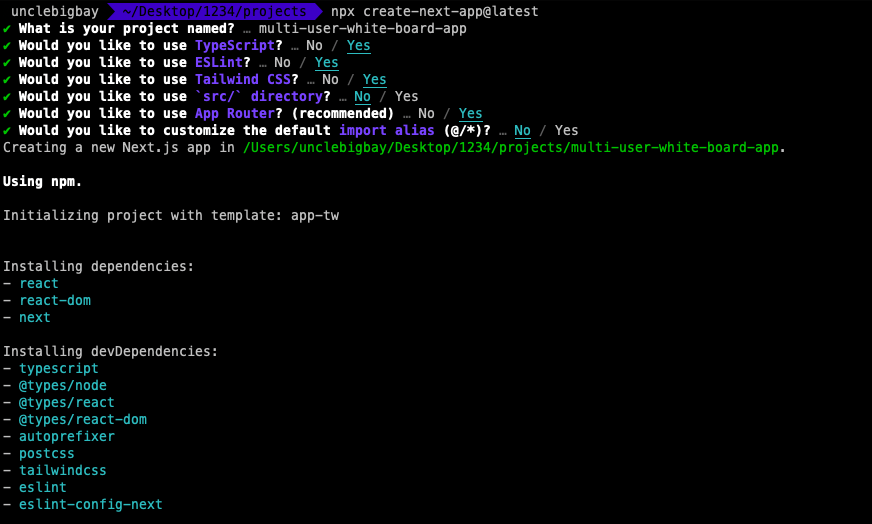
To create a Next.js app, open your terminal, cd into the directory you’d like to create the app in, and run the following command:
npx create-next-app@latest
Setup the installation to your preference or use the options below in the screenshot and wait for the installation to complete:
Dependencies Installations
We'll install two additional packages in our project. Navigate into your newly created project folder using the command below.
cd multi-user-white-board-app
Step 1: Supabase JS
Run the command below to install the Supabase SDK.
npm install @supabase/supabase-js
Step 2: Stream SDK
Run the command below to install the Stream Chat and React video SDK in your project.
npm install stream-chat @stream-io/video-react-sdk
Step 3: Finally, start your server with the command below.
npm run dev
Your server should start running on the port 3000. Visit http://localhost:3000 on your browser and your app should look something like this.

Setting Up Environment Variables
Next, we're going to set up the Supabase and Stream chat environment variables that we'll be needing for our project. Open the project in your favorite code editor (we love VSCode).
Next, Create a new .env file in the root of your project folder. Then add the following variables with your project's corresponding values, and save the .env file.
NEXT_PUBLIC_SUPABASE_URL=
NEXT_PUBLIC_SUPABASE_API_KEY=
NEXT_PUBLIC_SUPABASE_SERVICE_ROLE_SECRET=
NEXT_PUBLIC_STREAM_CHAT_API_KEY=
NEXT_PUBLIC_STREAM_CHAT_SECRET_KEY=
Please refer to the 'Getting Your Supabase API Keys' and step 5 in the 'Setting Up Your Video Project' section to grab your respective project keys.
Unsetting NextJS Theme
We're going to remove the default NextJS dark theme styling so that we can customize our design.
Open the globals.css file and comment out the body tag CSS rules there as shown below.
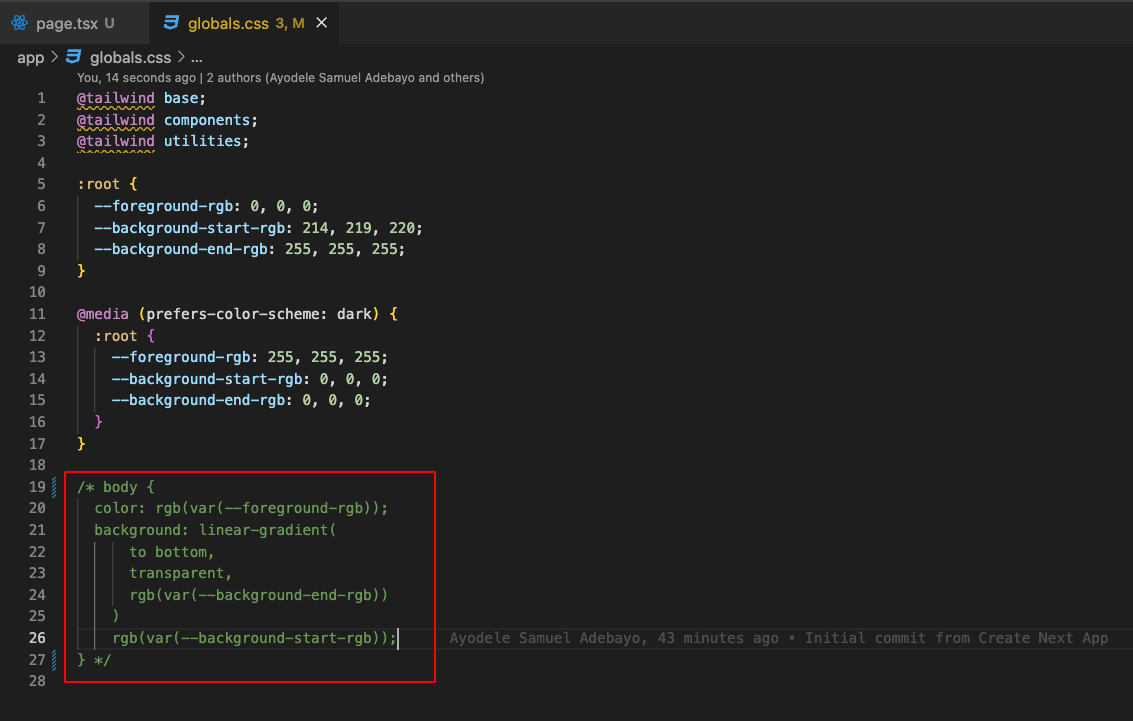
If you check your browser, you'll observe the NextJS page is now in a light theme.

Initializing Supabase Client
Next, we're going to set up a Supabase client instance using the createClient function from supabase. This will enable us to programmatically access our supabase project features such as the magic link authentication, and database CRUD operations.
In your app folder create a new lib folder with a new initSupabase.ts file inside and add the following lines of code.
import { createClient } from "@supabase/supabase-js";

const supabaseUrl = process.env.NEXT_PUBLIC_SUPABASE_URL!;
const supabaseAnonKey = process.env.NEXT_PUBLIC_SUPABASE_API_KEY!;

export const supabase = createClient(supabaseUrl, supabaseAnonKey);

// Admin Access
const service_role_key = process.env.NEXT_PUBLIC_SUPABASE_SERVICE_ROLE_SECRET!;
const supabaseWithAdminRole = createClient(supabaseUrl, service_role_key, {
  auth: {
    autoRefreshToken: false,
    persistSession: false,
  },
});

// Access auth admin api
export const adminAuthClient = supabaseWithAdminRole.auth.admin;
Building the Frontend (Part 1)
We're going to divide the front end into two parts. In this part, we're going to build out the login page component first along with the supabase authentication flow, while we'll build the dashboard, drawing room, and other UI in the next part.
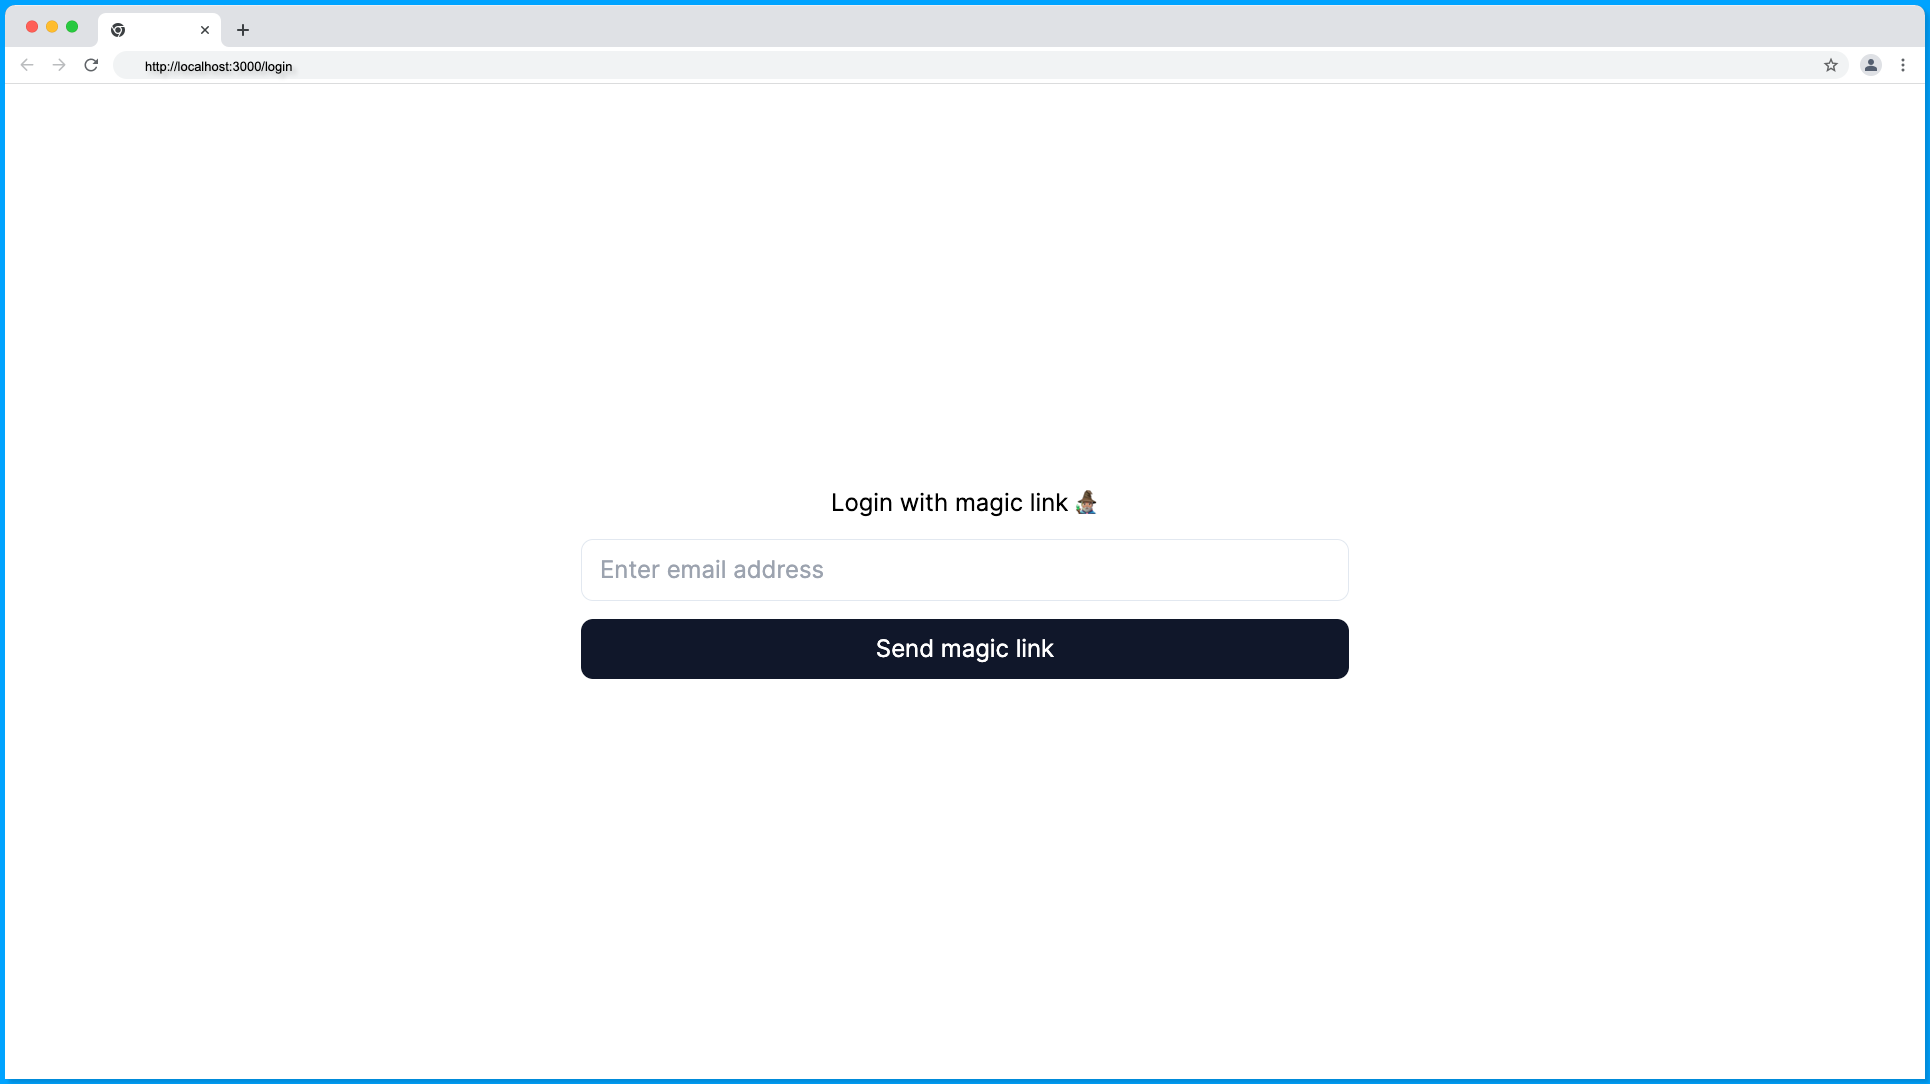
Building the Login Page
We're going to start with the login interface. This is where the user can enter their email address and request for a magic link to their email to be authenticated.
In your app folder, create a new login folder with an page.tsx file and add the following code.
"use client";
import React, { useState } from "react";
import { supabase } from "../lib/initSupabase";
const LoginPage = () => {
const [emailAddress, setEmailAddress] = useState<string>("");
const [isLoading, setIsLoading] = useState<boolean>(false);
const [isTokenSent, setIsTokenSent] = useState<boolean>(false);
const authenticateUser = async (e: React.FormEvent) => {
e.preventDefault();
if (!emailAddress) {
alert("Email address is required");
return;
}
setIsLoading(true);
const { data, error } = await supabase.auth.signInWithOtp({
email: emailAddress,
options: {
emailRedirectTo: window.location.origin,
},
});
if (error) {
console.error(error);
throw new Error("Something went wrong");
}
if (data) {
setIsTokenSent(true);
setTimeout(() => {
setIsTokenSent(false); // show the login ui after 5 seconds
setIsLoading(false);
}, 5000);
}
};
return (
<form
onSubmit={authenticateUser}
className='flex flex-col gap-3 justify-center items-center h-screen max-w-lg mx-auto'
>
<label>Login with magic link 🧙🏽♂️</label>
<input
type='text'
placeholder='Enter email address'
className='border border-slate-200 w-full px-3 py-2 rounded-lg'
onChange={(e) => setEmailAddress(e.target.value)}
value={emailAddress}
/>
<button
type='submit'
className='px-3 py-2 bg-slate-900 text-white rounded-lg text-base w-full'
disabled={isTokenSent || isLoading}
>
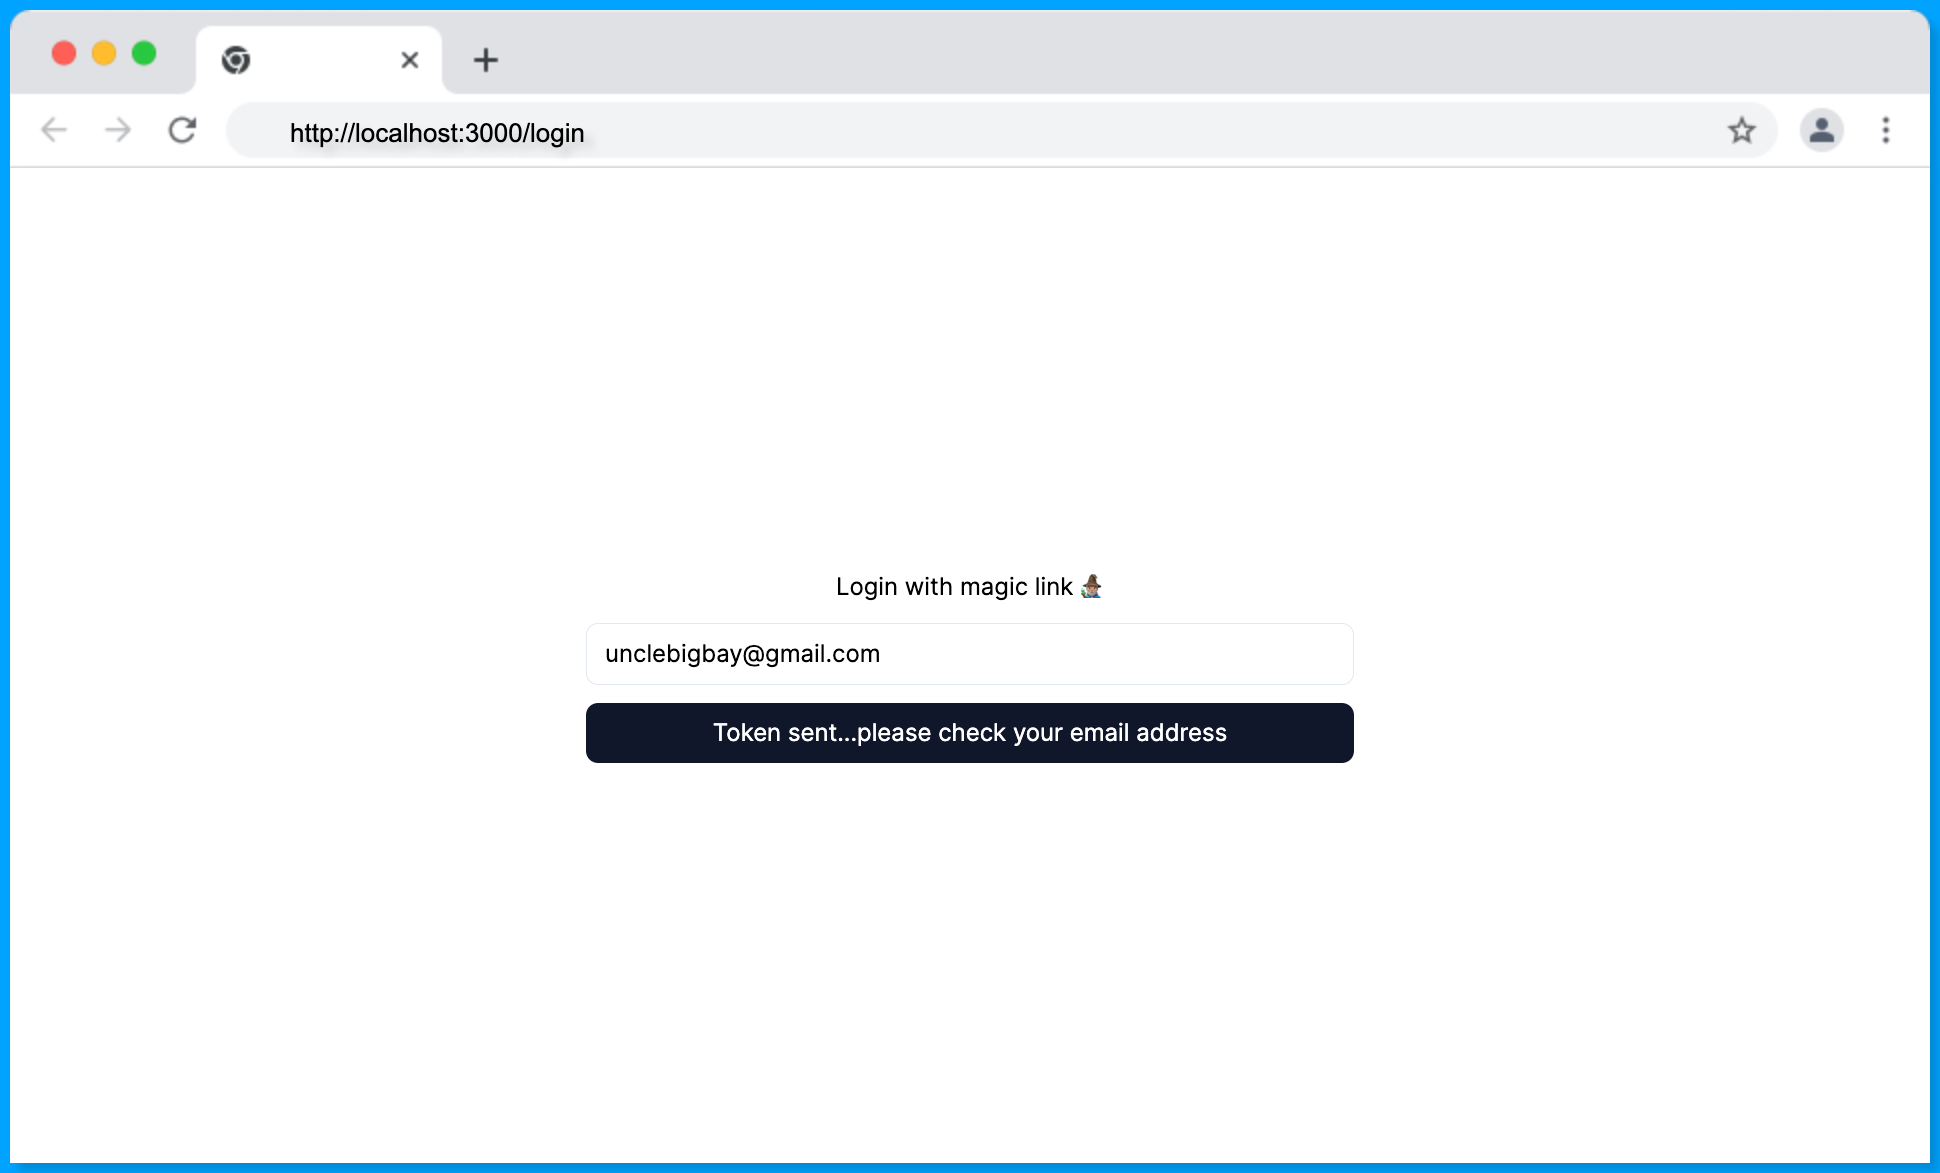
{isTokenSent
? "Token sent...please check your email address"
: isLoading
? "One moment please..."
: "Send magic link"}
</button>
</form>
);
};
export default LoginPage;
From the code above:
We import the
supabasehelper function into our login page.We have three states to keep track of the user email address, the loading state, and the
isTokenSentstatus to determine if the token has been sent.Next, we have the
authenticateUserfunction which firstly validates that the email address is provided before proceeding to thesupabase.auth.signInWithOtpfunction that sends the magic link to the user's email box.The
emailRedirectToin the function allows us to specify where we want the user to be redirected after being authenticated, which is the index route in this case.Finally, we notify the user that the token has been sent by setting
isTokenSentto true and we display the 'Send magic link' button again after 5 seconds using thesetTimeoutcallback function.
When you visit http://localhost:3000/login, your login page should look something as follows:
Testing the Supabase Magic Link Authentication Flow
Watch the supabase magic link authentication flow demo below.
Follow the steps below to test your magic link authentication implementation so far.
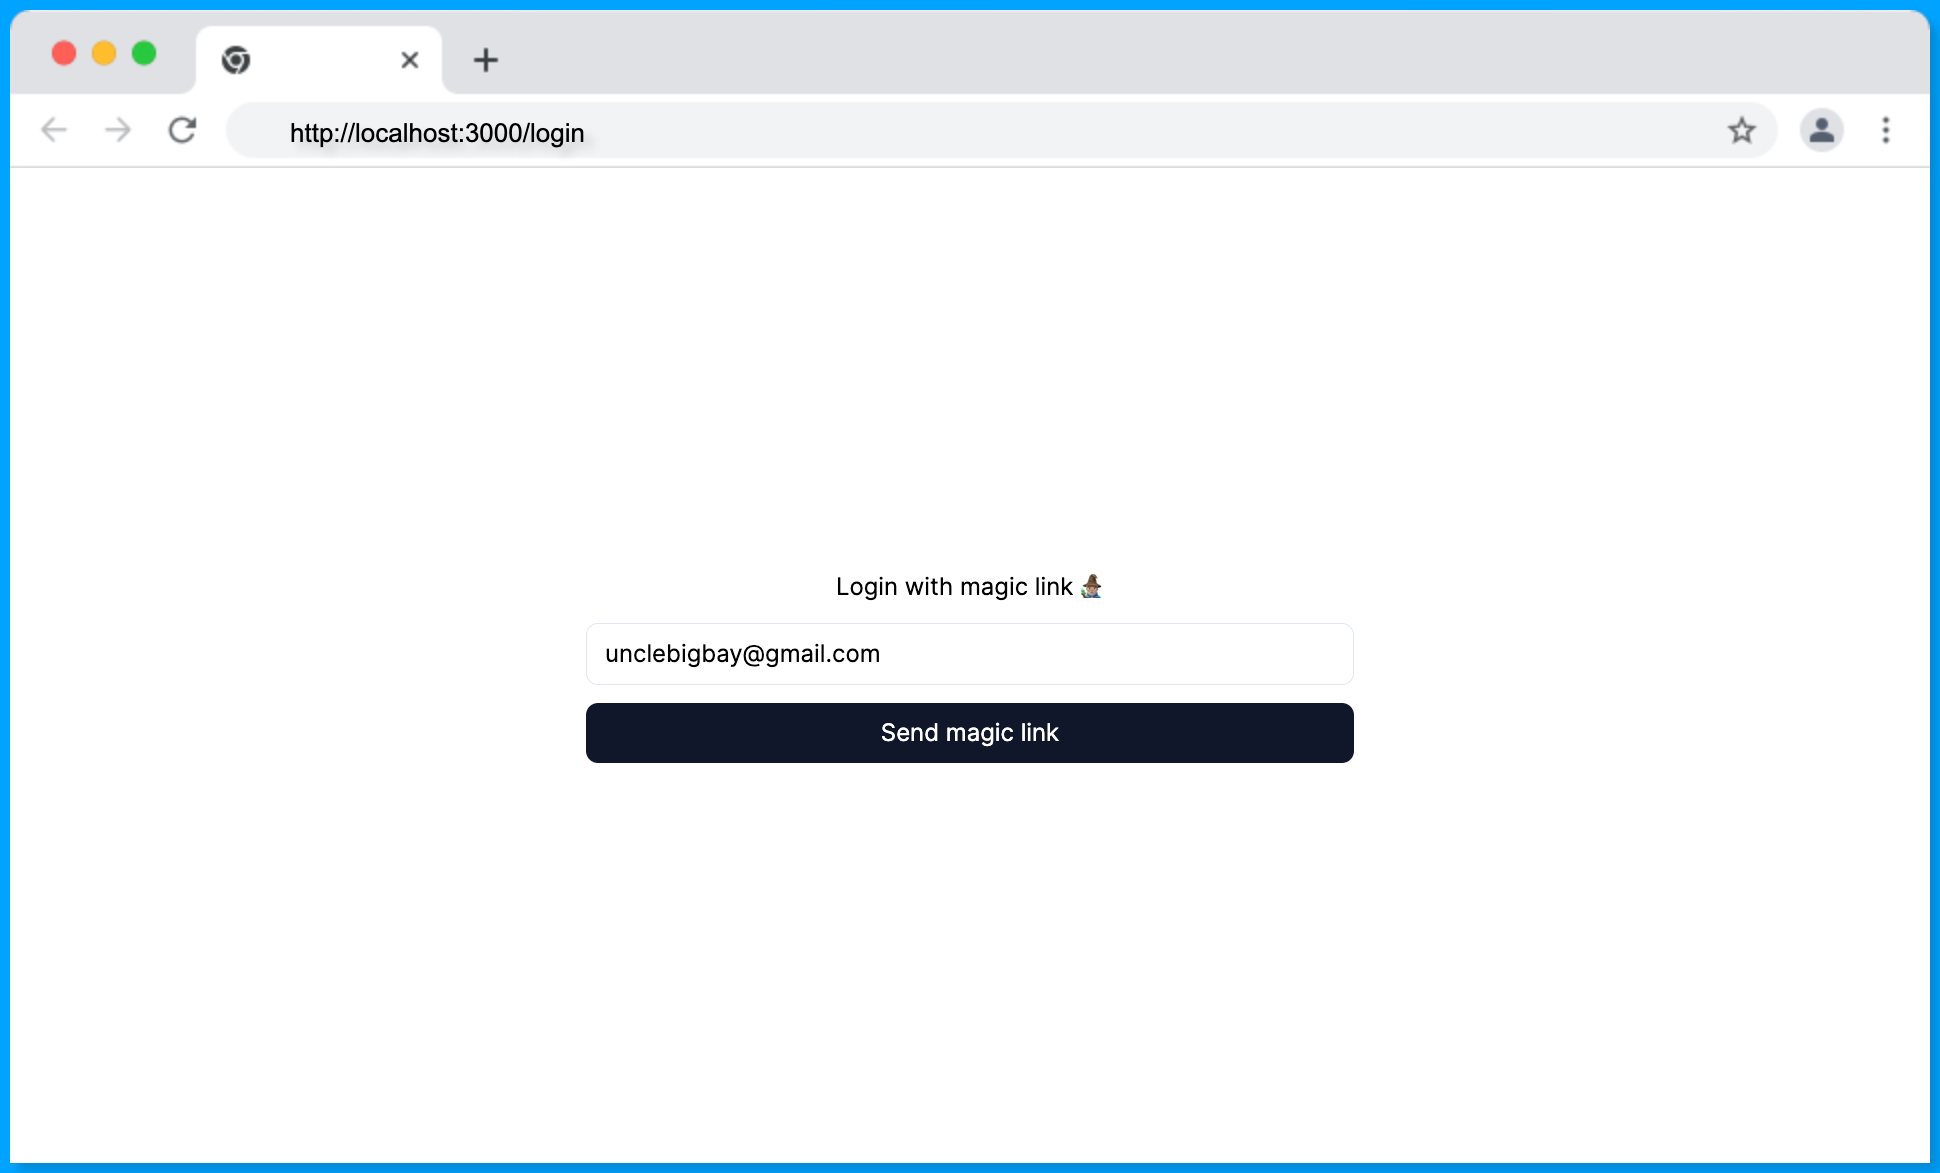
Step 1: Enter your email address and click the 'Send magic link' button.
Step 2: You'll be notified that the magic link is sent.
Step 3: Check your email box for the magic link message.
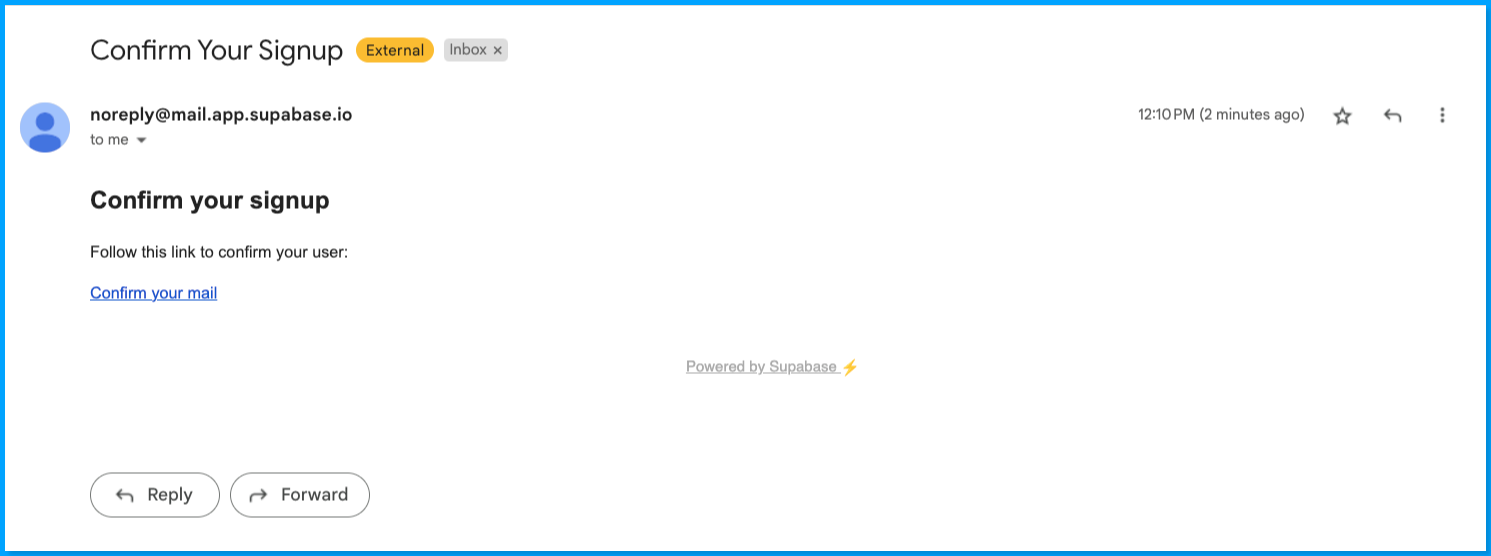
First-time users will see the following message to confirm their email address and sign up.
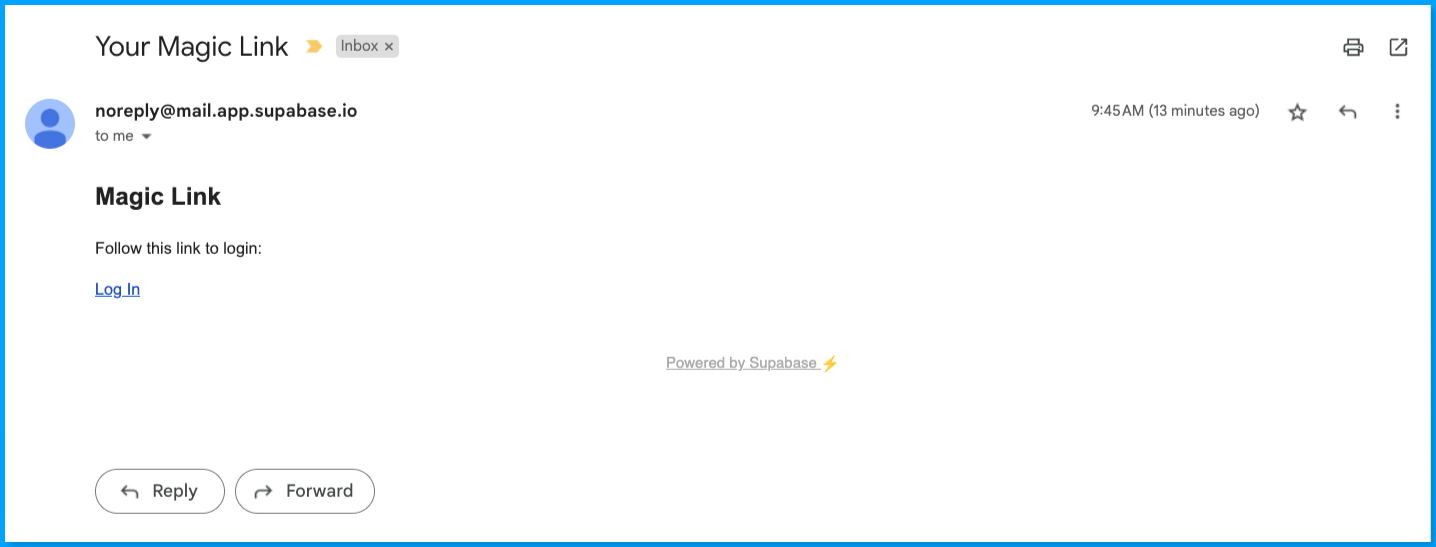
While already registered users will see a different message to log in.
Step 4: Click on the provided link in the message and you'll be redirected back to your application localhost index page once the supabase has authenticated you successfully.
Hurray 🎉, you've made it to the end of the Frontend Part 1 of our application, now, we'll proceed to build the backend part of our application in the next section.
Building the Backend Part
In this backend part, we're going to create the essential backend service functions needed for our app users and drawing rooms.
First, create a new services folder in the app folder. The services folder is where we'll keep any database-related functions.
Room Services
The room service will include the functions for creating, retrieving, updating, and deleting drawing rooms.
In the services folder, create a new drawing-room.service.ts file with the following two lines of code:
import { supabase } from "../lib/initSupabase";

const DRAWING_ROOM_TABLE = "drawing-rooms"; // supabase table name
From the two lines of code above, we're importing the supabase init function and also creating a constant variable name for our drawing room table. This is the same name as the supabase table we created earlier in the 'Setting Up the Supabase Database Schema' section.
Now, we can proceed to create the individual drawing room service functions, and add each of the functions in the file one after the other.
Create Drawing Room Service
This function will handle the creation of a new drawing room, it'll accept the new room's name, userId, and the isPublic status. It is also not going to be password-protected by default.
export const createDrawingRoom = async (
  name: string,
  userId: string,
  isPublic: boolean
) => {
  const { data } = await supabase
    .from(DRAWING_ROOM_TABLE)
    .insert({
      name,
      owner: userId,
      isPublic,
      isPasswordProtected: false,
      password: null,
    })
    .select();

  return data;
};
Fetch User Drawing Rooms Service
This function will be used for fetching all the drawing rooms belonging to a user. It'll only accept a userId and returns all the drawing rooms whose owner matches the userId.
export const fetchUserDrawingRooms = async (userId: string) => {
  const { data } = await supabase
    .from(DRAWING_ROOM_TABLE)
    .select()
    .eq("owner", userId)
    .order("created_at", { ascending: false });

  return data;
};
Fetch Drawing Room By ID Service
This function will return a specific drawing room that matches the provided room id. We'll use this for viewing a specific drawing room later.
export const fetchDrawingRoomById = async (id: string) => {
  const { data } = await supabase
    .from(DRAWING_ROOM_TABLE)
    .select()
    .eq("id", id);
  return data;
};
Update Drawing Room Service
This function will be used to update the drawings drawn in the room. We'll be passing the roomId and the latest drawing object to it.
export const updateRoomDrawing = async (roomId: string, drawing: any) => {
  await supabase
    .from(DRAWING_ROOM_TABLE)
    .update({
      drawing,
    })
    .eq("id", roomId)
    .select();
};
That's all for the drawing room service function, these functions will allow us to manage the drawing room from the supabase database. Next, we'll create a similar service function for our app users.
User Service
The user services are functions that'll be used to access users' data from the database or create user tokens.
Create a new user.service.ts file in the services folder with the following line of code:
import { adminAuthClient, supabase } from "../lib/initSupabase";
From the code above, we're importing the supabase database admin authentication and supabase instance client function. These two functions will allow us to access and manage the user record on supabase.
Now, we'll proceed to create the individual user service functions. Add each of the functions in the file one after the other.
Get User Session Service
This function will be used to retrieve the session data of the currently logged-in user from supabase.
// User session
export const getUserSession = async () => {
  const { data, error } = await supabase.auth.getSession();
  return data.session;
};
Fetch User By ID
This function will be used to get a user profile by their ID.
// User profile
export const fetchUserById = async (userId: string) => {
  const { data, error } = await adminAuthClient.getUserById(userId);
  return data;
};
Generate User Token (Stream Chat)
Next, we're going to create a function to generate stream chat video tokens for users. This token will allow users to join a video channel that is associated with a drawing room.
// User's stream token
export const generateUserVideoToken = async (userId: string) => {
  const res = await fetch("/api/generate-user-video-instance", {
    method: "POST",
    body: JSON.stringify({ userId }),
  });
  const data = await res.json();
  return data;
};
Finally, we're going to create the /api/generate-user-video-instance route that we've referenced in the function above.
Step 1: Create a new api folder in the app folder
Step 2: Create a new generate-user-video-instance folder in the api folder
Step 3: Create a new route.ts file with the following code.
import { NextRequest, NextResponse } from "next/server";
import { StreamChat } from "stream-chat";

const STREAM_CHAT_API_KEY = process.env.NEXT_PUBLIC_STREAM_CHAT_API_KEY!;
const STREAM_CHAT_SECRET_KEY = process.env.NEXT_PUBLIC_STREAM_CHAT_SECRET_KEY!;

export const config = {
  api: {
    bodyParser: true,
  },
};

export async function POST(req: NextRequest) {
  try {
    const { userId } = await req.json();

    if (!userId) {
      return NextResponse.json({ message: "user id is required" });
    }

    // Creating an instance of StreamChat
    const streamChat = new StreamChat(
      STREAM_CHAT_API_KEY,
      STREAM_CHAT_SECRET_KEY
    );

    // Creating a token for the user
    const token = streamChat.createToken(userId);

    return NextResponse.json({
      message: "Token generated successfully",
      token: token,
      username: userId,
    });
  } catch (error) {
    return NextResponse.json({
      status: 500,
      body: "An error occurred while processing the request." + error,
    });
  }
}
From the code above we're creating an instance of stream chat and generating a new token for the user using the Stream createToken method, we then return the generated token and the user's id as their username to the generateUserVideoToken function.
Hurray 🎉, now we're done with the major services of our application. We'll proceed to build part 2 of our project front-end.
Building the Frontend (Part 2)
In this part, we're going to build out each UI component and page layout for our application.
First, create a new components folder in the app folder. This is where we'll organize all our app's UI component files.
Building the Navbar
We're going to create our app's reusable navbar component, which will allow us to navigate to other pages of our application.
Create a new Navbar.tsx file in the components folder with the following lines of code.
import React from "react";
type Props = {
session: any;
owner?: any;
isRoom?: boolean;
room?: any;
isLoadingRoom?: boolean;
participantCount?: number;
};
const Navbar = (props: Props) => {
const { session, owner, isRoom, room, isLoadingRoom, participantCount } =
props;
const shouldShowRoomName = isRoom && room?.name;
const shouldShowRoomVisibilityBadge = isRoom && !isLoadingRoom;
const isRoomOwner = owner?.id === session?.user.id;
return (
<nav className='bg-white z-20 border border-slate-200 w-full p-4'>
<div className='mx-auto flex justify-between items-center'>
<section className='flex gap-2 items-center'>
<a
href='/'
className='text-lg font-semibold md:text-2xl text-blue-500'
>
Guess Draw
</a>
{shouldShowRoomName && (
<div className='hidden md:flex gap-2'>
<span className='text-slate-400'>·</span>
<h3 className='text-slate-500'>{room?.name}</h3>
</div>
)}
{shouldShowRoomVisibilityBadge && (
<div className='hidden md:flex gap-2'>
<span className='text-slate-400'>·</span>
<span className='rounded-full text-xs font-medium bg-green-100 py-1 px-2 text-green-600'>
{room?.isPublic ? "Public" : "Private"}
</span>
</div>
)}
{owner && (
<div className='hidden lg:flex gap-2'>
<span className='text-slate-400'>·</span>
<h3 className='text-slate-500'>
Owned by {owner?.user_metadata?.userName}{" "}
{isRoomOwner && <>(You)</>}
</h3>
</div>
)}
{participantCount ? (
<div className='hidden md:flex gap-2'>
<span className='text-slate-400'>·</span>
<h3 className='text-slate-500'>
{participantCount} participants
</h3>
</div>
) : null}
{!isRoom && session && (
<>
<span className='text-slate-400'>·</span>
<h3 className='text-slate-500'>
Welcome back @{session?.user?.user_metadata?.userName}
</h3>
</>
)}
</section>
<section className='flex items-center gap-2'>
{isRoom && (
<a
href='/'
target='_blank'
className='flex items-center font-semibold text-sm px-2.5 py-2 rounded-full gap-1 bg-blue-600 text-white hover:bg-blue-500'
>
<svg
xmlns='http://www.w3.org/2000/svg'
fill='none'
viewBox='0 0 24 24'
strokeWidth={1.5}
stroke='currentColor'
className='w-5 h-5'
>
<path
strokeLinecap='round'
strokeLinejoin='round'
d='M13.5 6H5.25A2.25 2.25 0 003 8.25v10.5A2.25 2.25 0 005.25 21h10.5A2.25 2.25 0 0018 18.75V10.5m-10.5 6L21 3m0 0h-5.25M21 3v5.25'
/>
</svg>
<span>Dashboard</span>
</a>
)}
<div
className={`h-10 w-10 overflow-hidden rounded-full`}
style={{ background: session?.user?.user_metadata?.userColor }}
/>
</section>
</div>
</nav>
);
};
export default Navbar;
From the Navbar component above, we're rendering some nav items based on certain conditions which we're going to be declaring later as we build other parts of our application.
The navbar props and conditions are explained below:
| Prop and Conditions | Description |
session | An authenticated user object prop. |
owner | The room owner data prop. |
isRoom? | A prop to indicate whether the navbar has been rendered in a drawing room or not. |
room | Current room object prop. |
isLoadingRoom | Prop to determine whether the room is currently been fetched. |
participantCount | This is the number of users participating in a room. |
shouldShowRoomName | Condition to display the room name on the navbar only when the navbar is rendered in a drawing room. |
shouldShowRoomVisibilityBadge | Condition to show the room visibility badge when a user is in a drawing room and is not loading the room data. |
isRoomOwner | Condition to check if the current user is the owner of the room or not. |
Next, we'll render the Navbar component to our index page. Update your app/page.tsx file with the following code.
"use client";

import Navbar from "./components/Navbar";
import { useEffect, useState } from "react";
import { getUserSession } from "./services/user.service";
import { supabase } from "./lib/initSupabase";

export default function Home() {
  const [session, setSession] = useState<any>();
  const [isAuthenticating, setIsAuthenticating] = useState<boolean>(true);

  function generateUserColor() {
    const colors = [
      "#3b82f6",
      "#14b8a6",
      "#f87171",
      "#eab308",
      "#a855f7",
      "#6366f1",
    ];
    const index = Math.floor(Math.random() * colors.length);
    return colors[index];
  }

  function createUsernameFromEmail(email: string) {
    try {
      let username = email?.split("@")[0];
      return username;
    } catch (error) {
      throw new Error("Error occurred while creating username: " + error);
    }
  }

  useEffect(() => {
    getUserSession()
      .then((session) => {
        if (session) {
          // First time user (don't have username and color )
          const isNewUser =
            !session?.user?.user_metadata?.userName &&
            !session?.user?.user_metadata?.userColor;

          if (isNewUser) {
            const userName = createUsernameFromEmail(
              session?.user?.email as string
            );
            const userColor = generateUserColor();
            supabase.auth.updateUser({
              data: { userName, userColor },
            });

            const sessionWithUsername = {
              ...session?.user,
              user_metadata: {
                userName,
                userColor,
              },
            };

            setSession(sessionWithUsername);
            setIsAuthenticating(false);
          }

          // Returning user
          setSession(session);
          setIsAuthenticating(false);
        } else {
          window.location.href = "/login";
        }
      })
      .catch((error) => {
        throw new Error("Error occurred while fetching user session: " + error);
      });
  }, []);

  if (isAuthenticating) {
    return (
      <div className='min-h-screen flex justify-center items-center'>
        <p>Validating session. please wait...</p>
      </div>
    );
  }

  console.log(session); // currently logged in user object

  return (
    <main>
      <Navbar session={session} />
    </main>
  );
}
From the code above,
We're rendering a loading message 'Validating session. please wait...', while we're determining if there's an active supabase session on the browser.
To determine if there's a session, we're invoking the
getUserSessionservice that we've created earlier in theuseEffectto get the information of the currently logged-in user when the component is mounted.If there's a session which means a user is logged in, we then check if the user is a new user by checking if they have
userNameanduserColorin their supabaseuser_metadata. Theuser_metadataobject allows us to save custom user data to the user's record on the supabase database.If they're a new user, we want to create a new
userNamefor them from their email address by calling thecreateUsernameFromEmailfunction and also generate auserColorfor their account through thegenerateUserColorfunction.Else, if there's no session, the user is redirected to the login page.
Finally, we're passing the
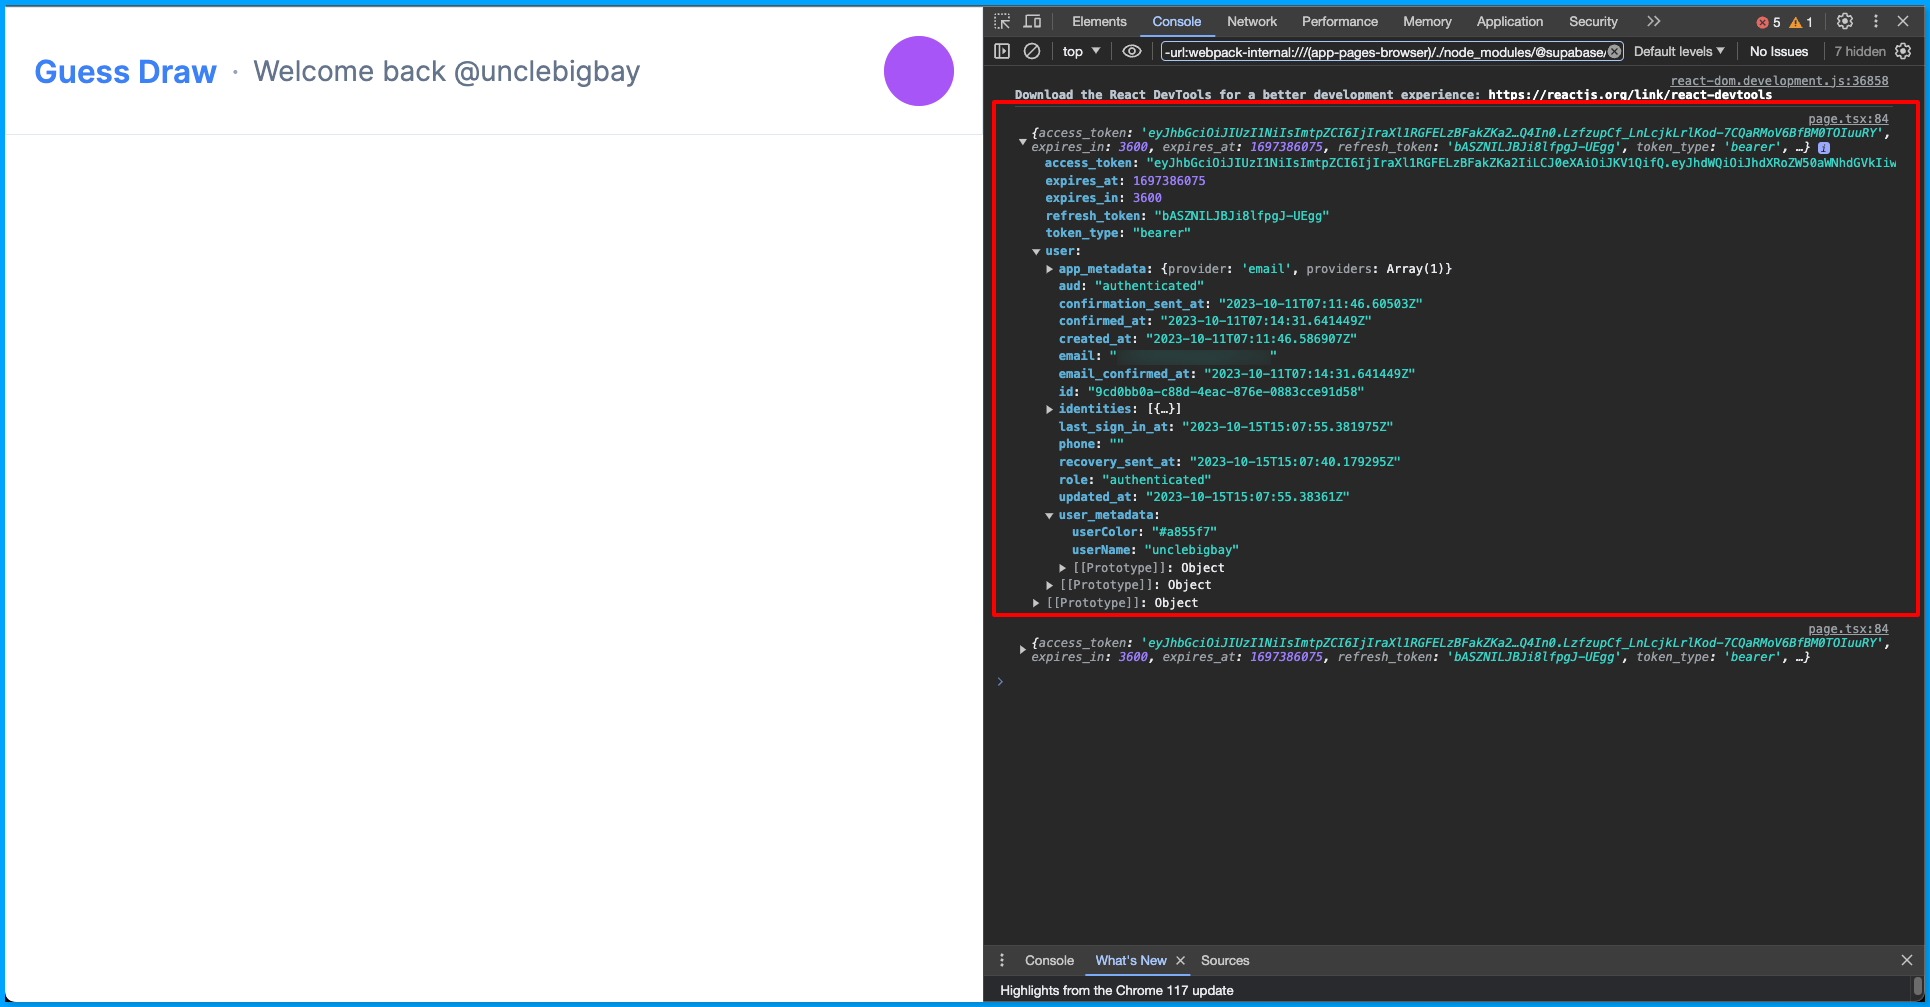
sessionobject state to theNavbarcomponent as a prop and logging the values of thesessionto the browser console.
Refresh your index page and it should now look something like the screen below with the Navbar component showing the username and color of the currently logged-in user.
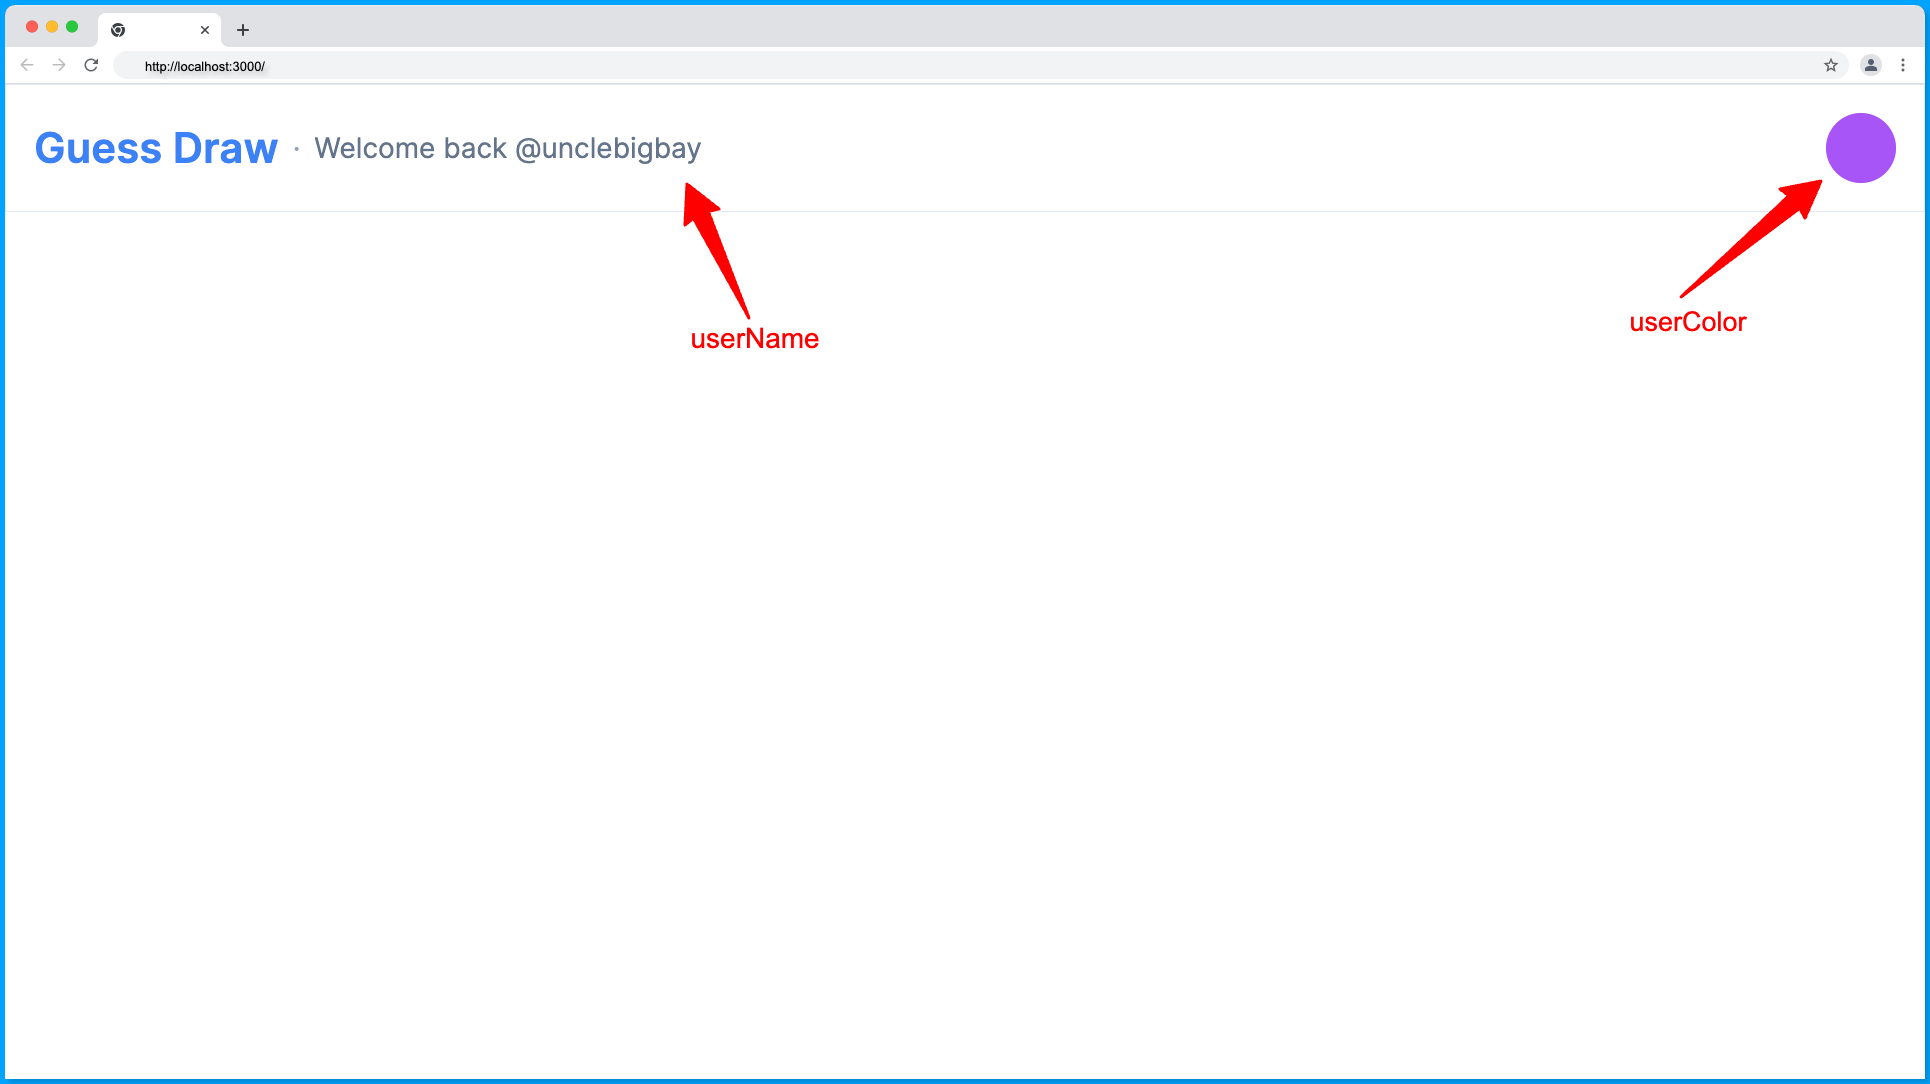
Later in this tutorial, we'll implement it such that the userName will be used as the camera display name while the userColor will be used as the cursor color to identify the user in the drawing room.
Check your browser console for the value of the session that we logged.
Building the Dashboard
In this section, we'll build the dashboard interfaces where the drawing rooms will be listed in cards and users will be able to create new drawing rooms using a form modal.
Below is a breakdown of the components that make up the dashboard page:
The dashboard Header
The drawing room card section
The drawing room card skeleton selection, and
The new room modal
Now, let's create them in ascending order, create a new dashboard folder in the components folder.
Building the Dashboard Header Component
The dashboard header component is where a greeting text and the new room bottom will be displayed.
Create a new Header.tsx file in the dashboard folder with the following code:
import React from "react";

type Props = { session: any; setShowCreateRoomModal: Function };

const Header = (props: Props) => {
  const { session, setShowCreateRoomModal } = props;
  return (
    <section className='w-full flex justify-between items-center'>
      <h3 className='text-slate-600'>
        Welcome back, @{session?.user?.user_metadata?.userName} 👋🏽
      </h3>
      <button
        className='flex items-center font-semibold text-sm px-2.5 py-2 rounded-full gap-1 bg-blue-600 text-white hover:bg-blue-500'
        onClick={() => setShowCreateRoomModal(true)}
      >
        <svg
          xmlns='http://www.w3.org/2000/svg'
          fill='none'
          viewBox='0 0 24 24'
          strokeWidth='{1.5}'
          stroke='currentColor'
          className='w-5 h-5'
        >
          <path
            strokeLinecap='round'
            strokeLinejoin='round'
            d='M12 9v6m3-3H9m12 0a9 9 0 11-18 0 9 9 0 0118 0z'
          />
        </svg>
        <span>New Room</span>
      </button>
    </section>
  );
};

export default Header;
From the code above, the Header component is receiving two props, the session object so that we can make the name in the greeting message dynamic based on the currently logged-in user and the setShowCreateRoomModal function to toggle on the create room modal component.
Building the Room Card Component
Next, we're going to build the room card component that will show the room name, visibility status, and when the room was created.
Create a new RoomCard.tsx file in the dashboard folder with the following lines of code.
import Link from "next/link";
import { RoomType } from "./DashboardBody";

export const RoomCard = ({ id, name, created_at, isPublic }: RoomType) => {
  const createAt = new Date(created_at);
  return (
    <Link
      href={`/room/${id}`}
      className='flex items-start border border-slate-200 p-5 rounded-md justify-between w-full'
    >
      <div className='flex gap-3 flex-col w-full'>
        <h2 className='font-medium text-lg text-blue-500 capitalize'>{name}</h2>
        <span className='text-xs text-slate-500'>
          Created at {createAt.getDate()}/{createAt.getMonth()}/
          {createAt.getFullYear()}
        </span>
      </div>
      <span className='rounded-full text-xs font-medium bg-green-100 py-1 px-2 text-green-600'>
        {isPublic ? "Public" : "Private"}
      </span>
    </Link>
  );
};
We'll create the RoomType import later in this section.
Building the Room Card Skeleton Component
It's a good practice to show the loading state of a component in the frontend while fetching their dependency data from the backend. So, we're going to create a skeleton of the room card component, which will be displayed while the user-created room data are being fetched.
Add the following component after the RoomCard component in the RoomCard.tsx file.
export const RoomCardSkeleton = () => {
  return (
    <div className='flex gap-2 items-start border border-slate-200 p-5 rounded-md justify-between w-full'>
      <div className='flex gap-3 flex-col w-full'>
        <h2 className='bg-slate-100 rounded-md w-full'>
          <span className='invisible'>Name</span>
        </h2>
        <p className='bg-slate-100 rounded-md w-1/2'>
          <span className='invisible'>Created</span>
        </p>
      </div>
      <span className='bg-slate-100 rounded-full text-xs py-1 px-2'>
        <span className='invisible'>Public</span>
      </span>
    </div>
  );
};
This has the same structure as the RoomCard component but without dynamic data.
Building the New Room Modal Component
The new room modal component is a form that will be used to create a new room, it'll contain the form field for the room name and the visibility status of the room.
Create a new NewRoomModal.tsx file in the dashboard folder with the following lines of code:
import React, { useState } from "react";
import { createDrawingRoom } from "@/app/services/drawing-room.service";

type Props = {
  show: boolean;
  setShow: Function;
  loadUserDrawingRooms: Function;
  session: any;
};

const NewRoomModal = (props: Props) => {
  const { session, show, setShow, loadUserDrawingRooms } = props;
  const [roomName, setRoomName] = useState<string>("");
  const [isPublic, setIsPublic] = useState<boolean>(false);
  const [isCreatingRoom, setIsCreatingRoom] = useState<boolean>(false);

  return (
    <>
      {show && (
        <div className='fixed w-full inset-0'>
          <div
            className='absolute bg-black/50 w-full h-full'
            onClick={() => !isCreatingRoom && setShow(false)} // prevent closing modal while creating room
          />
          <div className='flex justify-center items-center h-screen'>
            <form
              className='bg-white relative z-10 flex flex-col gap-5 p-5 rounded'
              onSubmit={async (e) => {
                e.preventDefault();
                setIsCreatingRoom(true);
                const newRoom = await createDrawingRoom(
                  roomName,
                  session?.user?.id,
                  isPublic
                );
                loadUserDrawingRooms();
                window.location.href = `/room/${newRoom![0].id}`;
              }}
            >
              <h2 className='text-slate-700 text-lg'>Create new room</h2>
              <div className='flex flex-col gap-2'>
                <input
                  type='text'
                  placeholder='Room Name'
                  className='border border-slate-300 py-2.5 px-3 rounded'
                  onChange={(e) => setRoomName(e.target.value)}
                  value={roomName}
                />
              </div>
              <div className='flex gap-1 items-center text-slate-700 text-sm'>
                <label>Public</label>
                <input
                  type='checkbox'
                  placeholder='Room Name'
                  className='border border-slate-300 rounded'
                  checked={isPublic}
                  onChange={(e) => setIsPublic(e.target.checked)}
                />
              </div>

              <button
                className='font-semibold text-sm px-2.5 py-2 rounded-full gap-1 bg-blue-600 text-white hover:bg-blue-500'
                type='submit'
                disabled={isCreatingRoom}
              >
                {isCreatingRoom ? "Please wait..." : "Create"}
              </button>
            </form>
          </div>
        </div>
      )}
    </>
  );
};

export default NewRoomModal;
The props and states from the NewRoomModal component is explained below.
| Prop and States | Description |
show | A prop boolean value of the current visibility status of the modal. |
setShow | A prop function to toggle the visibility of the modal (true/false). |
loadUserDrawingRooms | A prop unction to load the user drawing rooms. |
session | The authenticated user object prop. |
roomName | A state for the room input text. |
isPublic | A state for the room visibility status checkbox. |
isCreatingRoom | A state to determine when a room is been created. |
Finally, when the form is submitted, we invoke the createDrawingRoom service function to create a new room on supabase, then we fetch the updated rooms of the user by invoking the loadUserDrawingRooms function and redirecting the user to the newly created room page.
Building the Rooms Component
This component will be composed of the Header, RoomCard, RoomCardSkeleton, and the NewRoomModal components that we've created above.
Create a new DashboardBody.tsx file in the dashboard folder with the following lines of code:
"use client";

import React, { useEffect, useState } from "react";
import { usePathname } from "next/navigation";
import { RoomCard, RoomCardSkeleton } from "./RoomCard";
import NewRoomModal from "./NewRoomModal";
import { fetchUserDrawingRooms } from "@/app/services/drawing-room.service";
import Header from "./Header";

export type RoomType = {
  id: string;
  name: string;
  created_at: string;
  isPublic: boolean;
};

type Props = {
  session: any;
};

const DashboardBody = (props: Props) => {
  const { session } = props;
  const pathname = usePathname();
  const isDashboard = pathname === "/";

  const [rooms, setRooms] = useState<RoomType[] | null>(null);
  const [loading, setLoading] = useState<boolean>(true);
  const [showCreateRoomModal, setShowCreateRoomModal] =
    useState<boolean>(false);

  // Conditions
  const hasNotCreatedARoom = !loading && rooms?.length === 0;
  const hasAtLeastOneRoom = rooms && rooms!.length >= 0;
  const shouldShowRoom = !loading && hasAtLeastOneRoom;

  const loadUserDrawingRooms = async () => {
    return fetchUserDrawingRooms(session?.user?.id).then((res) => {
      setRooms(res);
    });
  };

  useEffect(() => {
    if (session?.user?.id) {
      loadUserDrawingRooms().then((res) => {
        setLoading(false);
      });
    }
  }, [session?.user?.id]);

  return (
    <div className='max-w-5xl flex flex-col gap-10 mx-auto px-4 pt-10'>
      {isDashboard && (
        <Header
          session={session}
          setShowCreateRoomModal={setShowCreateRoomModal}
        />
      )}

      {hasNotCreatedARoom && (
        <p className='text-slate-600 text-center mt-3'>
          Your drawing rooms will display here when you create new rooms.
        </p>
      )}

      <section className='grid grid-cols-1 sm:grid-cols-3 gap-3'>
        {loading && (
          <>
            {Array(5)
              .fill(5)
              .map((_, i) => (
                <RoomCardSkeleton key={i} />
              ))}
          </>
        )}

        {shouldShowRoom && (
          <>
            {rooms?.map(({ id, name, created_at, isPublic }) => (
              <RoomCard
                key={id}
                id={id}
                name={name}
                created_at={created_at}
                isPublic={isPublic}
              />
            ))}
          </>
        )}
      </section>
      <NewRoomModal
        show={showCreateRoomModal}
        setShow={setShowCreateRoomModal}
        loadUserDrawingRooms={loadUserDrawingRooms}
        session={session}
      />
    </div>
  );
};

export default DashboardBody;
From the code above:
| Prop, Conditions, and States | Descriptions |
RoomType | This is the room type, this is also exported to be used in the RoomCard.tsx file component. |
DashboardBody | Accept only the session prop, we'll use this to fetch the users' drawing rooms from the useEffect. |
hasNotCreatedARoom | A condition that the user has not created any room. |
hasAtLeastOneRoom | A condition that the user does not have zero rooms. |
shouldShowRoom | Condition that the room has been loaded and the user has at least a room that we can display. |
loadUserDrawingRooms | We're using this function to load the users' drawing rooms and also passing it as a prop to the NewRoomModal. |
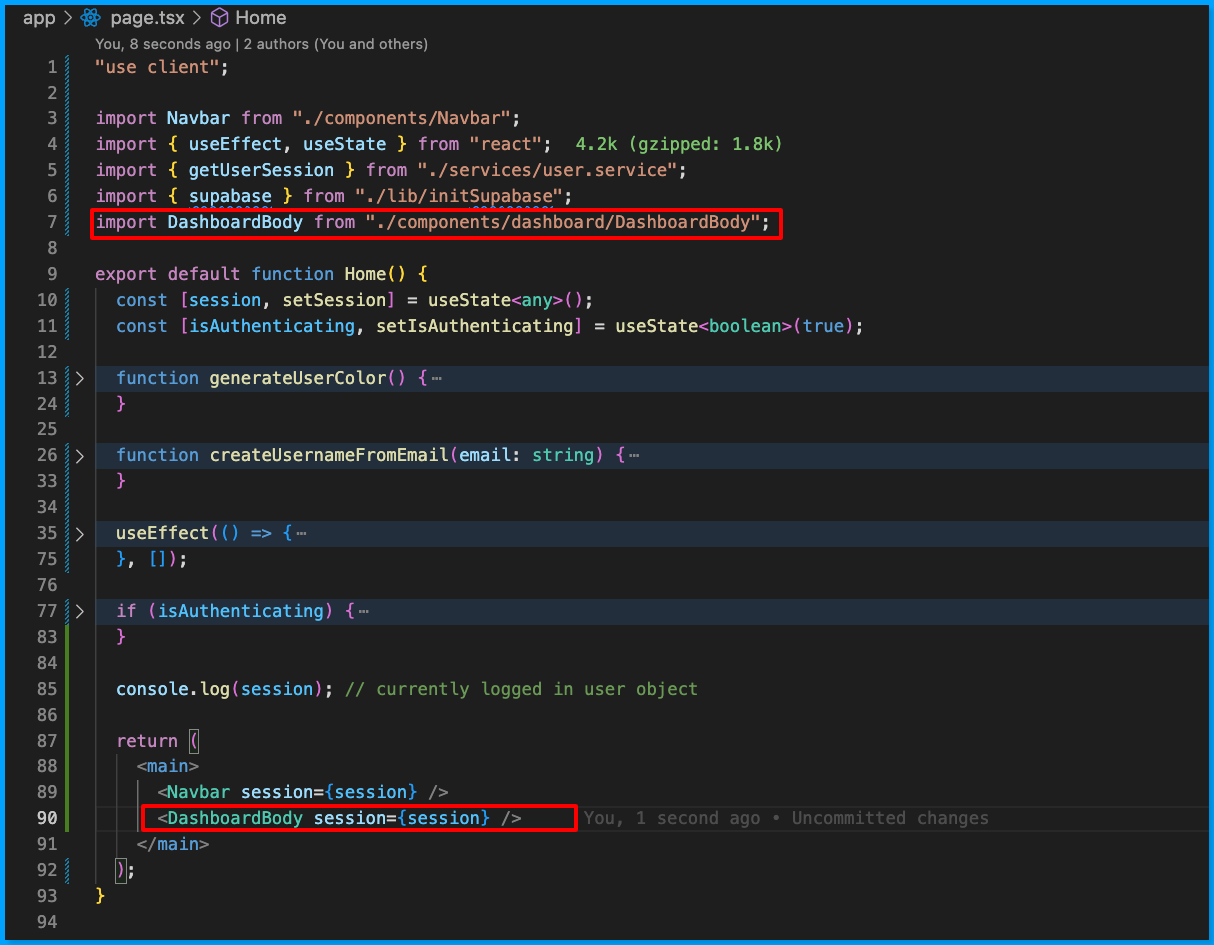
Now, import the DashboardBody component file at the top of the app/page.tsx file
import DashboardBody from "./components/dashboard/DashboardBody";
And render the DashboardBody after the Navbar component as follows:
<DashboardBody session={session} />
Here's an illustration of the above statements:
Testing the Dashboard Flow
When you refresh your dashboard, you should observe the following demonstration:
Testing Creating New Rooms
Next, the video below demonstrates the functionality of the new room modal, you can proceed to test the new room modal functionality by following the video demo.
PS: The newly created room is redirecting to a 404 page because we haven't created a page for it yet.
To check that everything works as expected, the redirect URL should be a uuid format and not undefined, and when you refresh your supabase table, you should see a new record in the drawing-rooms table as shown below.

Next, we'll create a dynamic [roomId] route for the drawing rooms in the coming section.
Building the Drawing Room
The drawing board room is where participants can join a room, draw, and have a real-time video call as well. This is also going to be on the dynamic [roomId] route.
Step 1: Create a new room folder in the app folder.
Step 2: Create a new [roomId] folder.
Step 3: Create a new page.tsx file inside the [roomId] folder with the following lines of code.
"use client";

import React, { useEffect, useState } from "react";
import { fetchUserById, getUserSession } from "../../services/user.service";
import { useParams } from "next/navigation";
import { fetchDrawingRoomById } from "../../services/drawing-room.service";
import Navbar from "../../components/Navbar";

const DrawingRoomPage = () => {
  const { roomId } = useParams();
  const [owner, setOwner] = useState<any | null>(null);
  const [room, setRoom] = useState<any>([]);
  const [user, setUser] = useState<any>({});
  const [session, setSession] = useState<any>();
  const [isLoading, setIsLoading] = useState<boolean>(true);
  const [participantCount, setParticipantCount] = useState<number>(0);

  useEffect(() => {
    getUserSession().then((session) => {
      setSession(session);
      setUser(session?.user);

      fetchDrawingRoomById(roomId as string).then((room) => {
        const canEnterRoom =
          room![0].isPublic || room![0].owner === session?.user?.id;

        if (!canEnterRoom) {
          return (window.location.href = "/");
        }
        setRoom(room![0]);
        setIsLoading(false);
        fetchUserById(room![0].owner).then((res) => {
          setOwner(res.user);
        });
      });
    });
  }, []);

  return (
    <main>
      <Navbar
        session={session}
        owner={owner}
        room={room}
        isRoom
        isLoadingRoom={isLoading}
        participantCount={participantCount}
      />
    </main>
  );
};

export default DrawingRoomPage;
The prop, conditions, and states from the DrawingRoomPage component above is explained below:
| Variable, Conditions, and States | Description |
roomId | This is the ID variable of the current room from the URL, e.g., /room/1. Where 1 is the roomId. |
owner | State to keep the object data of the owner/creator of the current room |
room | State to keep the array information of the current drawing room. |
user | State to keep the object data of the currently logged-in user. |
session | State to keep the session of the currently logged-in user. |
isLoading | State to determine if HTTP calls are still in progress. |
participantCount | State to keep track of the number of users joining a room. |
canEnterRoom | Condition to determine if a user has access to enter a room. A user can only enter a room if they're the owner of the room or the room visibility is made public. |
Now, let's revisit the room URL that was returning 404, you can also access it from the dashboard as demonstrated below:
Let's also test the creation of new rooms with a different visibility status, and make it a public room this time, so we can test the accessibility when we share the URL as well.
From the demo above, you should observe that the new room been created has a visibility status of public on both its card and room navbar.
Next, we'll test the accessibility feature of the room, it is expected that when a user tries to access a private drawing room URL, they should be redirected back to their dashboard. Accessing a public drawing room will grant them access as demonstrated below:
Hurray 🎉, now that the create room functionality is completed and that we can block access to rooms based on their visibility status. We'll proceed to build the drawing room components next.
Building the Drawing Room
We'll break the drawing room layout into three components.
The drawing menu component: This is where all the drawing tools such as eraser, pen size, and color will be located.
The whiteboard component: This is the drawable area in the drawing room.
The participant video component: This is where the video layout of the participants will be displayed.
First, create a new drawing-room folder in the components folder. This is where other drawing room components will be organized.
Building the drawing menu component
The drawing menu is where a room participant can select the size and color of their pen, as well as the eraser to clean any error in their drawing.
Create a new DrawingMenu.tsx file in the drawing-room folder with the following code:
import React, { useState } from "react";
import { DrawingPen } from "./BoardContainer";

type DrawingMenuProp = {
  drawingPen: DrawingPen;
  setDrawingPen: Function;
};

const DEFAULT_COLORS = ["#000000", "#FF0000", "#00FF00", "#0000FF", "#FFFF00"];

const DRAW_SIZES = [
  { size: 1, height: 10, width: 10 },
  { size: 2, height: 15, width: 15 },
  { size: 5, height: 20, width: 20 },
  { size: 10, height: 25, width: 25 },
  { size: 15, height: 30, width: 30 },
  { size: 20, height: 35, width: 35 },
  { size: 50, height: 40, width: 40 },
];

const DrawingMenu = (props: DrawingMenuProp) => {
  const { drawingPen, setDrawingPen } = props;
  const [isEraserActive, setIsEraserActive] = useState<boolean>(false);
  const [previousColor, setPreviousColor] = useState(""); // Store the previous color

  const toggleEraser = () => {
    if (!isEraserActive) {
      // Activate eraser
      setPreviousColor(drawingPen.color);
      setDrawingPen((prevState: DrawingPen) => ({
        ...prevState,
        color: "#ffffff", // Set the eraser color to white
      }));
      setIsEraserActive(true);
    } else {
      // Deactivate eraser
      setDrawingPen((prevState: DrawingPen) => ({
        ...prevState,
        color: previousColor, // Revert to the previous color
      }));
      setIsEraserActive(false);
    }
  };

  const changeColor = (e: React.ChangeEvent<HTMLInputElement>) => {
    setDrawingPen((prevState: DrawingPen) => ({
      ...prevState,
      color: e.target.value,
    }));
  };

  return (
    <div className='fixed z-10 bottom-0 border-t mx-auto w-full justify-center items-center flex xl:w-auto xl:relative xl:flex-col gap-10 xl:justify-start bg-white xl:rounded-sm p-4'>
      <div className='xl:flex flex-col max-w-[100px] gap-10  bg-white rounded-lg'>
        <div
          className='cursor-pointer flex items-center justify-center h-10 w-10 rounded-full border border-slate-400 opacity-90'
          style={{ background: drawingPen.color }}
        >
          <input
            type='color'
            value={drawingPen.color}
            onChange={changeColor}
            className='appearance-none bg-transparent opacity-90 cursor-pointer border-none h-10 w-10 [&::-webkit-color-swatch]:rounded-full [&::-webkit-color-swatch]:border-none'
          />
        </div>
        {DEFAULT_COLORS.map((color) => (
          <div
            key={color}
            className='hidden xl:flex cursor-pointer h-10 w-10 rounded-full border border-slate-400 opacity-90'
            style={{ background: color }}
            onClick={() => {
              setDrawingPen((prevState: DrawingPen) => ({
                ...prevState,
                color,
              }));
            }}
          />
        ))}
      </div>
      <div className='relative group'>
        <div className='cursor-pointer rounded-full border border-slate-400 text-slate-800 opacity-90 h-10 w-10 flex items-center justify-center group-hover:bg-slate-300'>
          <svg
            xmlns='http://www.w3.org/2000/svg'
            fill='none'
            viewBox='0 0 24 24'
            strokeWidth={1.5}
            stroke='currentColor'
            className='w-6 h-6'
          >
            <path
              strokeLinecap='round'
              strokeLinejoin='round'
              d='M9.53 16.122a3 3 0 00-5.78 1.128 2.25 2.25 0 01-2.4 2.245 4.5 4.5 0 008.4-2.245c0-.399-.078-.78-.22-1.128zm0 0a15.998 15.998 0 003.388-1.62m-5.043-.025a15.994 15.994 0 011.622-3.395m3.42 3.42a15.995 15.995 0 004.764-4.648l3.876-5.814a1.151 1.151 0 00-1.597-1.597L14.146 6.32a15.996 15.996 0 00-4.649 4.763m3.42 3.42a6.776 6.776 0 00-3.42-3.42'
            />
          </svg>
        </div>
        <div className='hidden absolute z-10 bottom-10 p-3 rounded-lg border bg-slate-700 justify-center gap-2.5 items-center group-hover:flex flex-col'>
          {DRAW_SIZES.map(({ size, width, height }) => (
            <div
              className='flex gap-2 items-center text-slate-200 justify-start'
              key={size}
            >
              <span className='text-xs'>{size}</span>
              <div
                className='cursor-pointer rounded-full border border-slate-200 opacity-90'
                style={{
                  width,
                  height,
                  background:
                    drawingPen.size === size ? drawingPen.color : "transparent",
                }}
                onClick={() => {
                  setDrawingPen((prevState: DrawingPen) => ({
                    ...prevState,
                    size: Number(size),
                  }));
                }}
              />
            </div>
          ))}
        </div>
      </div>

      <div
        className='cursor-pointer rounded-full border border-slate-400 text-slate-800 opacity-90 h-10 w-10 flex items-center justify-center'
        style={{
          background: isEraserActive ? "#cbd5e1" : "transparent",
        }}
        onClick={toggleEraser}
      >
        <svg
          xmlns='http://www.w3.org/2000/svg'
          fill='none'
          viewBox='0 0 24 24'
          strokeWidth={1.5}
          stroke='currentColor'
          className='w-6 h-6'
        >
          <path
            strokeLinecap='round'
            strokeLinejoin='round'
            d='M5.25 7.5A2.25 2.25 0 017.5 5.25h9a2.25 2.25 0 012.25 2.25v9a2.25 2.25 0 01-2.25 2.25h-9a2.25 2.25 0 01-2.25-2.25v-9z'
          />
        </svg>
      </div>
    </div>
  );
};

export default DrawingMenu;
From the code above, the drawingPen accepts two props, the drawingPen object and the setDrawingPen function. These props will be used to keep track of and update the color and size of the users' pen, and we'll be sharing this state and function from the drawing board component itself later.
We'll discuss the remaining states and functions in the table below:
| States and Functions | Description |
isEraserActive | State to determine if the eraser is turned on by the user. |
previousColor | State to keep the previous color the user was using before they turned on the eraser, this will enable us to switch back to that color when they turned off the eraser. |
toggleEraser | The function that allows us to toggle the eraser feature and restore to the previous color the user was using. |
changeColor | Function to handle color selection by the user for drawing. |
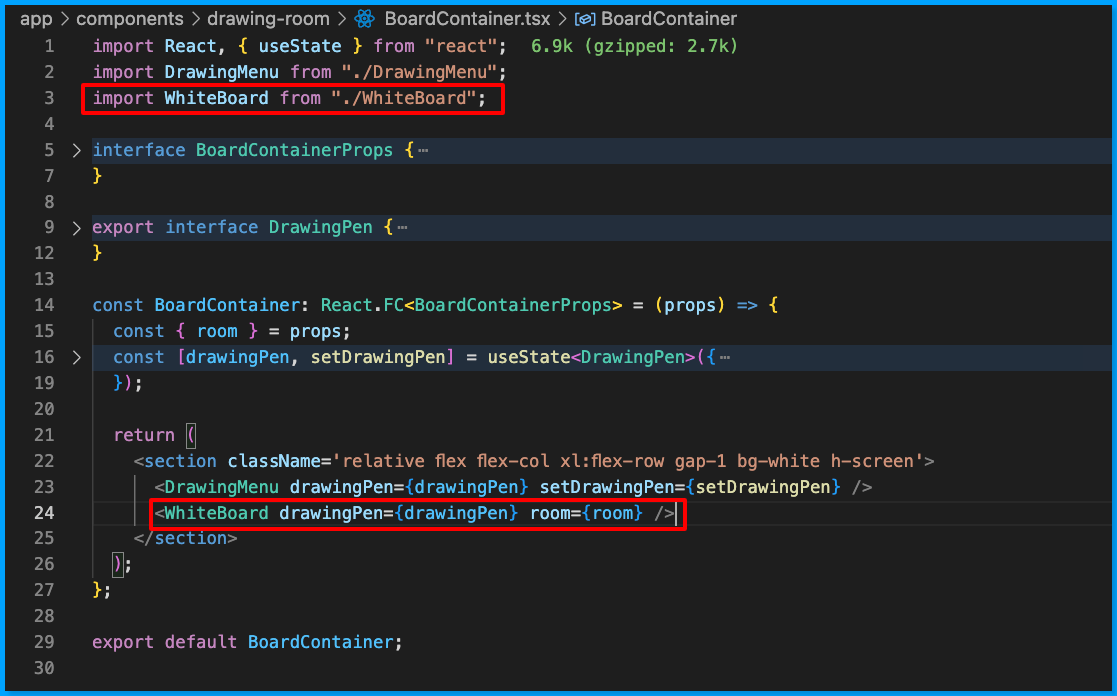
Next, create a new BoardContainer.tsx file in the drawing-room folder. This folder will serve as a wrapper for the drawingMenu and the Whiteboard component.
Add the following lines of code in the BoardContainer.tsx file:
 import React, { useState } from "react";
import DrawingMenu from "./DrawingMenu";

interface BoardContainerProps {
  room: any;
}

export interface DrawingPen {
  color: string;
  size: number;
}

const BoardContainer: React.FC<BoardContainerProps> = (props) => {
  const { room } = props;
  const [drawingPen, setDrawingPen] = useState<DrawingPen>({
    color: "#000000",
    size: 5,
  });

  return (
    <section className='relative flex flex-col xl:flex-row gap-1 bg-white h-screen'>
      <DrawingMenu drawingPen={drawingPen} setDrawingPen={setDrawingPen} />
    </section>
  );
};

export default BoardContainer;
From the code above:
The BoardContainer component is accepting only one prop, the room object containing the information of a drawing room.
We also created the drawingPen state to keep track of the users' pen size and color, then we passed them as a prop to the DrawingMenu component.
Now, let's proceed to render the BoardContainer in our drawing room.
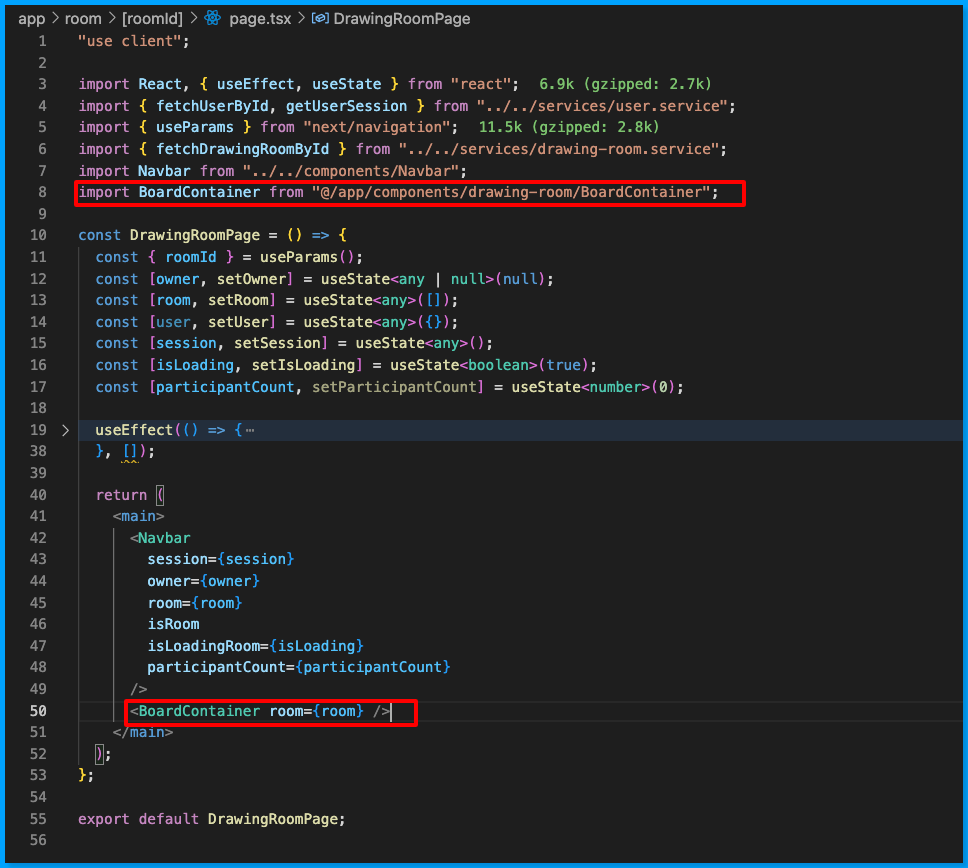
Import the BoardContainer component in the [roomId].tsx component.
import BoardContainer from "@/app/components/drawing-room/BoardContainer";
And render the component after the Navbar component as follows.
<BoardContainer room={room} />
Below is an illustration of the above statements:
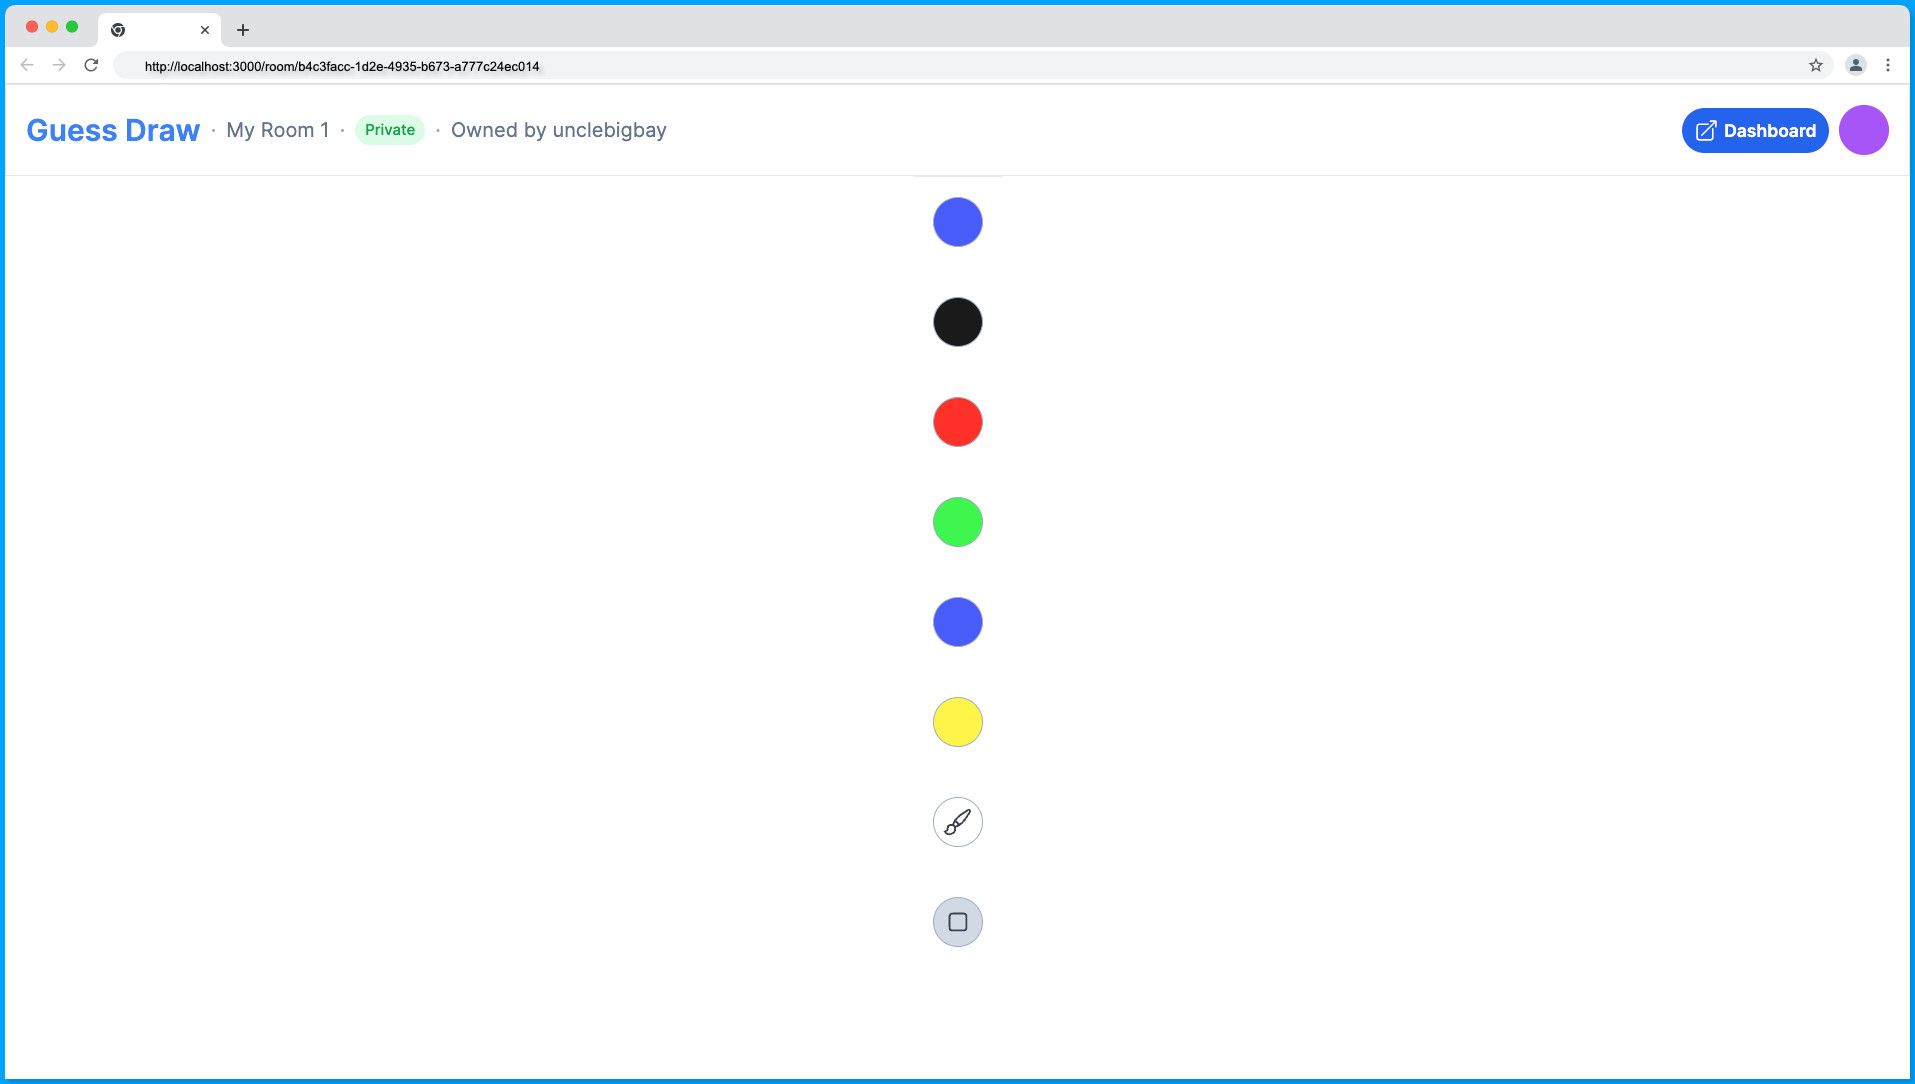
When you visit a drawing room, you should see the following drawing tools displayed.
Building the Drawing Board
The drawing board is a whiteboard component that users can draw on, and it is one of the major components of our whiteboard application.
We're going to build our custom drawing Canva, there are also alternative packages we can use to achieve this such as Excalidraw, Tldraw, etc. Feel free to customize this to your preference.
Step 1: Create a new WhiteBoard.tsx file in the drawing-room folder with the following code.
import React, { useEffect, useRef, useState } from "react";
import { RealtimeChannel } from "@supabase/supabase-js";
import { updateRoomDrawing } from "@/app/services/drawing-room.service";
import { supabase } from "@/app/lib/initSupabase";
import { fetchUserById, getUserSession } from "@/app/services/user.service";
import { DrawingPen } from "./BoardContainer";

interface BoardProps {
  room: any;
  drawingPen: DrawingPen;
}

function WhiteBoard(props: BoardProps) {
  const { room, drawingPen } = props;
  const MOUSE_EVENT = "cursor";

  const [session, setSession] = useState<any>();
  const [isAuthenticated, setIsAuthenticated] = useState<boolean>(false);
  const [channel, setChannel] = useState<RealtimeChannel | null>(null);
  const [drawingData, setDrawingData] = useState<string | null>(null);

  const boardAreaRef = useRef<HTMLDivElement>(null);
  const timeoutRef = useRef<NodeJS.Timeout | null>(null);
  const createdCursorsRef = useRef<string[]>([]);
  const canvas = document.querySelector<HTMLCanvasElement>("#board");

  const createUserMouseCursor = async (_userId: string) => {
    // Check if the cursor for this user has already been created
    if (createdCursorsRef.current.includes(_userId)) {
      return;
    }

    // Check if the cursor div for this user already exists
    const existingCursorDiv = document.getElementById(_userId + "-cursor");
    if (existingCursorDiv) {
      return;
    }

    const cursorDiv = document.createElement("div");
    const svgElem = document.createElement("svg");
    svgElem.innerHTML = `
<svg xmlns="http://www.w3.org/2000/svg" width="16" height="16" fill="currentColor" class="bi bi-cursor-fill" viewBox="0 0 16 16">
  <path d="M14.082 2.182a.5.5 0 0 1 .103.557L8.528 15.467a.5.5 0 0 1-.917-.007L5.57 10.694.803 8.652a.5.5 0 0 1-.006-.916l12.728-5.657a.5.5 0 0 1 .556.103z"/>
</svg>
`;

    cursorDiv.id = _userId + "-cursor";
    cursorDiv.classList.add("h-4", "w-4", "absolute", "z-50", "-scale-x-100");
    const { user } = await fetchUserById(_userId);
    cursorDiv.style.color = user?.user_metadata?.userColor;

    cursorDiv.appendChild(svgElem);
    if (boardAreaRef) {
      boardAreaRef.current!.appendChild(cursorDiv);
    }

    // Add the user to the list of created cursors
    createdCursorsRef.current.push(_userId);
  };

  const receivedCursorPosition = ({
    payload,
  }: {
    [key: string]: any;
    type: "broadcast";
    event: string;
  }) => {
    // console.log("Receiving cursor position: " + payload);
    const { userId: _userId, x, y } = payload || {};
    const cursorDiv = document.getElementById(_userId + "-cursor");

    if (cursorDiv) {
      cursorDiv.style.left = x + "px";
      cursorDiv.style.top = y + "px";
    } else {
      createUserMouseCursor(_userId);
    }
  };

  const sendMousePosition = (
    channel: RealtimeChannel,
    userId: string,
    x: number,
    y: number
  ) => {
    // console.log("Sending cursor position: ", { userId, x, y });
    return channel.send({
      type: "broadcast",
      event: MOUSE_EVENT,
      payload: { userId, x, y },
    });
  };

  useEffect(() => {
    boardAreaRef?.current?.addEventListener("mousemove", (e) => {
      if (isAuthenticated && channel) {
        const container = document.querySelector("#container"); // Get the container
        const containerOffset = container!.getBoundingClientRect();

        // Calculate relative mouse position within the container
        const relativeX = e.clientX - containerOffset.left;
        const relativeY = e.clientY - containerOffset.top;

        sendMousePosition(channel, session?.user?.id, relativeX, relativeY);
      }
    });
  }, [isAuthenticated, channel, session?.user?.id]);

  useEffect(() => {
    if (channel) {
      // Subscribe to mouse events.
      channel
        .on("broadcast", { event: MOUSE_EVENT }, (payload) => {
          receivedCursorPosition(payload);
        })
        .subscribe();
    }
    // eslint-disable-next-line react-hooks/exhaustive-deps
  }, [channel]);

  useEffect(() => {
    if (isAuthenticated && room.id) {
      const client = supabase;
      const channel = client.channel(room.id);
      setChannel(channel);

      // Get updates from db changes
      client
        .channel("any")
        .on(
          "postgres_changes",
          { event: "*", schema: "public", table: "drawing-rooms" },
          (payload: any) => {
            setDrawingData(payload.new.drawing);
          }
        )
        .subscribe();
    }
  }, [isAuthenticated, room.id]);

  useEffect(() => {
    getUserSession().then((session) => {
      if (session?.user?.id) {
        setSession(session);
        setIsAuthenticated(true);
      } else {
        setIsAuthenticated(false);
      }
    });
  }, [session?.user?.id, session?.user?.user_metadata?.userColor]);

  useEffect(() => {
    // Setting the initial image data from supabase
    if (room.drawing) setDrawingData(room.drawing);
  }, [room.drawing]);

  useEffect(() => {
    if (!canvas) return;
    const sketch = document.querySelector("#sketch")!;
    const sketchStyle = getComputedStyle(sketch);
    canvas.width = parseInt(sketchStyle.getPropertyValue("width"));
    canvas.height = parseInt(sketchStyle.getPropertyValue("height"));

    const mouse = { x: 0, y: 0 };
    const lastMouse = { x: 0, y: 0 };

    const getCanvasOffset = () => {
      const rect = canvas.getBoundingClientRect();
      return {
        left: rect.left,
        top: rect.top,
      };
    };

    const ctx = canvas.getContext("2d");
    if (!ctx) return;

    /* Drawing on Whiteboard */
    ctx.lineJoin = "round";
    ctx.lineCap = "round";
    ctx.lineWidth = drawingPen.size;
    ctx.strokeStyle = drawingPen.color;

    // Displaying the initial image data from supabase
    if (drawingData) {
      const image = new Image();
      image.onload = () => {
        ctx.drawImage(image, 0, 0);
      };
      image.src = drawingData;
    }

    const onPaint = () => {
      ctx.beginPath();
      ctx.moveTo(lastMouse.x, lastMouse.y);
      ctx.lineTo(mouse.x, mouse.y);
      ctx.closePath();
      ctx.stroke();

      if (timeoutRef.current !== null) clearTimeout(timeoutRef.current);
      timeoutRef.current = setTimeout(() => {
        const base64ImageData = canvas.toDataURL("image/png");
        updateRoomDrawing(room?.id, base64ImageData);
      }, 1000);
    };

    /* Mouse Capturing Events */
    canvas.addEventListener("mousemove", (e) => {
      const canvasOffset = getCanvasOffset();
      lastMouse.x = mouse.x;
      lastMouse.y = mouse.y;

      mouse.x = e.clientX - canvasOffset.left;
      mouse.y = e.clientY - canvasOffset.top;
    });

    canvas.addEventListener("mousedown", () => {
      canvas.addEventListener("mousemove", onPaint);
    });

    canvas.addEventListener("mouseup", () => {
      canvas.removeEventListener("mousemove", onPaint);
    });
    // eslint-disable-next-line react-hooks/exhaustive-deps
  }, [room?.id, drawingData, room.drawing, canvas]);

  useEffect(() => {
    if (!canvas) return;
    const ctx = canvas.getContext("2d");
    if (!ctx) return;

    ctx.lineWidth = drawingPen.size;
    ctx.strokeStyle = drawingPen.color;
  }, [drawingPen.size, drawingPen.color, canvas]);

  return (
    <div className='my-auto w-full h-full border p-2'>
      <div className='w-full h-full relative' id='sketch' ref={boardAreaRef}>
        <div id='container' className='w-full h-full'>
          <canvas className='w-full h-full' id='board'></canvas>
        </div>
      </div>
    </div>
  );
}

export default WhiteBoard;
The code implementation above includes a real-time collaborative drawing feature using Supabase. Here's a breakdown of what it does:
It initializes a canvas for drawing.
It sends the user's mouse position to a real-time channel on the supabase when they move their mouse.
It subscribes the user to that channel to get real-time cursor updates from other users.
It positions a custom SVG cursor based on the mouse position updates from other users.
It only creates a cursor once per user, styling it based on their details e.g
userColor.It uses Supabase channels, events, and real-time updates to enable real-time collaboration.
The result of the Whiteboard component will be a real-time collaborative drawing space where users can see each other's cursors move in real-time as they draw on the canvas (video demo after explanation and breakdown).
Here are more explanations and a breakdown of the Whiteboard component below:
We use useState hooks to create and store the user session, authentication status, the supabase channel, and the drawing data of the WhiteBoard component:
const [session, setSession] = useState<any>();
const [isAuthenticated, setIsAuthenticated] = useState<boolean>(false);
const [channel, setChannel] = useState<RealtimeChannel | null>(null);
const [drawingData, setDrawingData] = useState<string | null>(null);
The createUserMouseCursor function is an asynchronous function for creating a custom SVG cursor based on a participant detail e.g userColor.
const createUserMouseCursor = async (_userId: string) => {
  // ... code for creating and managing user mouse cursors
};
The receivedCursorPosition is a function for handling the incoming cursor positions from other participants and displaying them accordingly.
const receivedCursorPosition = ({
  payload,
}: {
  [key: string]: any;
  type: "broadcast";
  event: string;
}) => {
  // ... code for receiving and updating cursor positions
};
The sendMousePosition is a function for sending mouse positions of a participant via the supabase Realtime channel to other room participants.
const sendMousePosition = (
  channel: RealtimeChannel,
  userId: string,
  x: number,
  y: number
) => {
  // ... code for sending the mouse position
};
This useEffect hook with the below dependencies listens for mousemove events and sends positions when the user is authenticated and a channel exists.
useEffect(() => {
  // ... code to handle mousemove events and send positions
}, [isAuthenticated, channel, session?.user?.id]);
This useEffect with the below dependency subscribes to mouse events on the channel.
useEffect(() => {
  // ... code to subscribe to mouse events
}, [channel]);
This useEffect with the below dependencies sets up the Realtime channel for getting drawing events changes in the database when the user is authenticated and a room ID exists.
useEffect(() => {
  // ... code for setting up the Realtime channel
}, [isAuthenticated, room.id]);
This useEffect with the below dependencies sets the initial session information and authentication status of the user.
useEffect(() => {
  // ... code for setting the initial session
}, [session?.user?.id, session?.user?.user_metadata?.userColor]);
This useEffect with the below dependencies configures and sets up the canvas for drawing on the Whiteboard.
useEffect(() => {
  // ... code for configuring and setting up the canvas
}, [room?.id, drawingData, room.drawing, canvas]);
This useEffect with the below dependencies handles updates to the pen size and color.
useEffect(() => {
  // ... code for handling pen size and color updates
}, [drawingPen.size, drawingPen.color, canvas]);
Now let's test our implementation, import the WhiteBoard component in the BoardContainer component.
import WhiteBoard from "./WhiteBoard";
And render it after the DrawingMenu component as shown below.
<WhiteBoard drawingPen={drawingPen} room={room} />
Below is an illustration of the above statements:
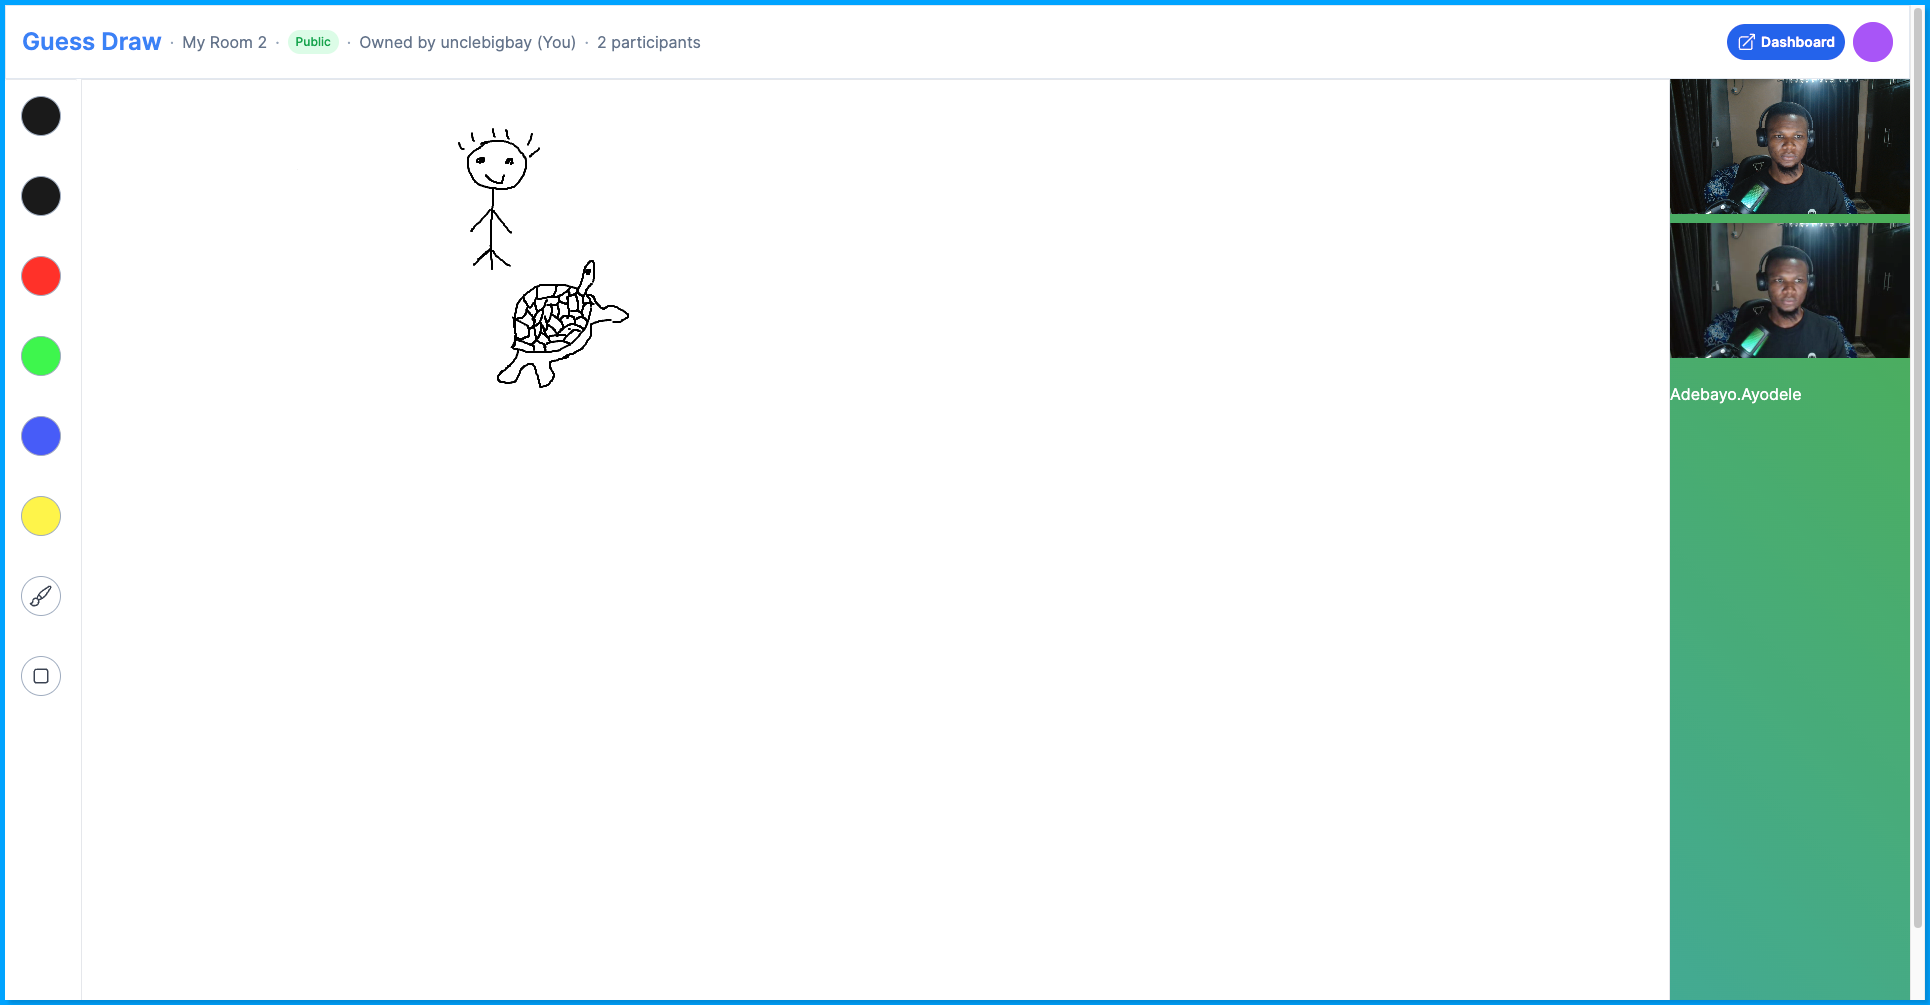
Watch the video demonstration of the implementation above featuring the live presence with a custom SVG cursor and real-time drawing with two browsers displayed side by side.
You can go ahead and test your application by logging in on two browsers (different email authentications) and sharing a public drawing room with the other browser as demonstrated above.
Bravo 🎉, we just completed the drawing and live presence feature of our application, next, we'll build the participant video feature.
Building the Participant Videos Feature
In this section, we're going to build out the participant video feature of our application using the Stream Video SDK, this will allow participants in a room to see and discuss with one another in real-time as they draw on the whiteboard.
How it works
Below is a quick breakdown of how the video feature implementation using the Stream Chat Video SDK is going to work:
We'll create a
initVideoCallfunction that will be invoked when a user enters a room.Next, in the
initVideoCallfunction we'll generate a video token for the user who wants to join the room call using thegenerateUserVideoTokenthat we created earlier in the user service.We'll then create a new video client from the
StreamVideoClientinstance using our Stream API key with the user object that wants to join the call. The user object should contain theirid,nameandimage.Next, we'll create a new call from the video client and pass an
idandtypeof the video call. The videoidwill be the same as theidof the room, while we'll set the type of the call to "development". You can check out the full list of Stream video call types and their difference from here.With the
initVideoCalllogic explained above, we can make use of the Stream Video SDK components and hooks to render participant videos and display data about a room video call.
Below is a table with some important functions and components to be aware of before we proceed.
| Stream Video Component, Hooks and Functions | Description |
StreamVideo | The <StreamVideo/> component is a provider that makes the call client and its state available to all child components and initializes internationalization. |
StreamCall | The <StreamCall /> component is a declarative component wrapper around Call objects. It utilizes the StreamCallProvider to make the call and its state available to all child components. |
useCallStateHooks | A Stream hook that exposes the video call functions. |
useCallCallingState | This function is from useCallStateHook, and it allows us to keep track of the status of the call such as RINGING, JOINED or RECONNECTING, with this function, we can display a loading indicator like a spinner component while the user is trying to join the call. |
useParticipantCount | This function is from useCallStateHook, it allows us to know the number of participating users in a particular room. |
useLocalParticipant | This function is from useCallStateHook, and it helps to get an instance of the currently logged-in user on a particular browser. |
useRemoteParticipants | This function is from useCallStateHook, it returns the participants joining the call aside from the currently logged-in user on a browser. |
Spinner | A component that will be displayed when a participant video component or client is been loaded. |
Building the Video Wrapper Component
The video wrapper component will serve as the Video provider wrapping around our video feature layout implementation, it'll expose the Stream Chat Video components to other child components we'll be creating.
Step 1: Create a new videos folder in the components folder
Step 2: Inside the videos folder, create a new VideoWrapper.tsx with the following lines of code:
import React, { useEffect, useState } from "react";
import {
  StreamCall,
  StreamVideo,
  StreamVideoClient,
  User,
} from "@stream-io/video-react-sdk";
import { generateUserVideoToken } from "@/app/services/user.service";
import Spinner from "./Spinner";

type Props = { children: any; userData: any; callId: string };

const VideoWrapper = (props: Props) => {
  const { children, userData, callId } = props;
  const [client, setClient] = useState<any>(null);
  const [call, setCall] = useState<any>(null);

  const initVideoCall = async () => {
    try {
      const { token } = await generateUserVideoToken(userData?.id);

      // Set up the user object
      const user: User = {
        id: userData?.id,
        name: userData?.user_metadata?.userName,
        image: `https://getstream.io/random_svg/?id=${userData?.user_metadata?.userName}&name=${userData?.user_metadata?.userName}`,
      };

      const video_client = new StreamVideoClient({
        apiKey: process.env.NEXT_PUBLIC_STREAM_CHAT_API_KEY!,
        user,
        token,
      });

      setClient(video_client);
      const callType = "development";
      const call = video_client.call(callType, callId);
      call.join({ create: true });

      setCall(call);
    } catch (error) {
      console.log(error);
    }
  };

  useEffect(() => {
    if (userData) {
      initVideoCall();
    }
  }, [userData]);

  if (!client || !call) {
    return (
      <div className='mt-2 h-32 flex justify-center items-center'>
        <Spinner />
      </div>
    );
  }

  return (
     <StreamVideo client={client}>
       <StreamCall call={call}>{children}</StreamCall>
     </StreamVideo>
  );
};

export default VideoWrapper;
From the code above, we're rendering a Spinner loader component while we're initiating a video call instance for the user.
The props and some logic in the VideoWrapper is explained below:
| Prop | Description |
userData | This is the detail of the user who wants to join the drawing room. |
children | This will be the video layout we'll render within the VideoWrapper component. We'll create the video layout in the next section. |
callId | This is the room id, we'll use this when a user wants to create or join a room video call. |
call.join({ create: true }); | This function will add the user to the video call or create a new call with the callId if the video call doesn't exist yet. |
Step 3: Create a new Spinner.tsx file in the videos folder with the following code:
import React from "react";

const Spinner = () => {
  return (
    <svg
      className='animate-spin h-5 w-5 text-white'
      fill='none'
      viewBox='0 0 24 24'
    >
      <circle
        className='opacity-25'
        cx={12}
        cy={12}
        r={10}
        stroke='currentColor'
        strokeWidth={4}
      />
      <path
        className='opacity-75'
        fill='currentColor'
        d='M4 12a8 8 0 018-8V0C5.373 0 0 5.373 0 12h4zm2 5.291A7.962 7.962 0 014 12H0c0 3.042 1.135 5.824 3 7.938l3-2.647z'
      />
    </svg>
  );
};

export default Spinner;
Building the Video Layout Component
Next, we're going to build out the participant video layout, this layout will contain the video component of each of the room participants. We'll use the Stream Video hooks to enable the camera and audio of the participants, so other people joining can see and hear one another.
Step 1: Create a new VideoLayout.tsx file inside the videos folder with the following code:
import {
  CallingState,
  StreamTheme,
  useCallStateHooks,
} from "@stream-io/video-react-sdk";
import React, { useEffect } from "react";
import Spinner from "./Spinner";
import LocalParticipantVideo from "./LocalParticipantVideo";
import RemoteParticipantVideoList from "./RemoteParticipantVideoList";

type Props = { setParticipantCount: Function };

const VideoLayout = (props: Props) => {
  const {
    useCallCallingState,
    useParticipantCount,
    useLocalParticipant,
    useRemoteParticipants,
  } = useCallStateHooks();

  const callingState = useCallCallingState();
  const localParticipant = useLocalParticipant();
  const remoteParticipants = useRemoteParticipants();
  const participantCount = useParticipantCount();

  useEffect(() => {
    props.setParticipantCount(participantCount);
  }, [participantCount, props]);

  if (callingState !== CallingState.JOINED) {
    return (
      <div className='mt-2 h-32 w-full flex justify-center items-center'>
        <Spinner />
      </div>
    );
  }

  return (
    <StreamTheme>
      <div className='grid grid-cols-2 xl:grid-cols-1 gap-10 xl:gap-4 text-white capitalize'>
        <LocalParticipantVideo participant={localParticipant} />
        <RemoteParticipantVideoList participants={remoteParticipants} />
      </div>
    </StreamTheme>
  );
};

export default VideoLayout;
From the code above, we're still making use of the hooks we explained earlier, and now rendering a <LocalParticipantVideo/> and <RemoteParticipantVideoList/> component which will be explained and created in the next steps.
Step 2: Create a new LocalParticipantVideo.tsx file in the videos folder with the following code.
import {
  ParticipantView,
  StreamVideoParticipant,
} from "@stream-io/video-react-sdk";
import Spinner from "./Spinner";

const LocalParticipantVideo = (props: {
  participant?: StreamVideoParticipant;
}) => {
  const { participant } = props;
  return (
    <div className='relative h-32 w-32 xl:w-full'>
      <ParticipantView
        participant={participant!}
        VideoPlaceholder={VideoPlaceholder}
      />
    </div>
  );
};

const VideoPlaceholder = () => {
  return (
    <div className='absolute inset-0 bg-slate-700 z-[1] text-center text-slate-300 flex items-center justify-center'>
      <Spinner />
    </div>
  );
};

export default LocalParticipantVideo;
From the code above, the LocalParticipantVideo component will render the video of the local participant which is the same as the camera of the current user on a PC, the same as you. The local video of the user will be sent as a remote video to other participants.
The VideoPlaceholder component will be displayed when the user's video is still loading.
Step 3: Create a new RemoteParticipantVideoList.tsx file in the videos folder with the following code:
import {
  ParticipantView,
  StreamVideoParticipant,
} from "@stream-io/video-react-sdk";
import React from "react";
import Spinner from "./Spinner";

type Props = {
  participants: StreamVideoParticipant[];
};

const RemoteParticipantVideoList = (props: Props) => {
  const { participants } = props;

  return (
    <div className='relative h-32 w-32 xl:w-full'>
      {participants.map((participant) => (
        <ParticipantView
          participant={participant}
          key={participant.sessionId}
          VideoPlaceholder={VideoPlaceholder}
        />
      ))}
    </div>
  );
};

export const VideoPlaceholder = ({
  participant,
}: {
  participant: StreamVideoParticipant;
}) => {
  return (
    <div className='absolute inset-0 bg-slate-700 z-[1] text-center text-slate-300 flex items-center justify-center'>
      <div className='hidden xl:flex items-center justify-center'>
        <span className='capitalize'>{participant.name}</span>
        <p className='lowercase ml-1'> is joining</p>
      </div>
      <div className='xl:hidden'>
        <Spinner />
      </div>
    </div>
  );
};

export default RemoteParticipantVideoList;
From the code above, we're rendering other remote participants' videos in the RemoteParticipantVideoList component and also displays a VideoPlaceholder component when the user's video is still loading.
Step 4: Import the VideoWrapper and the VideoLayout component in the [roomId]/page.tsx file after the BoardContainer import statement as shown below.
import VideoWrapper from "@/app/components/videos/VideoWrapper";
import VideoLayout from "@/app/components/videos/VideoLayout";
Finally, update the return JSX in the DrawingRoomPage component to the following.
<main>
  <Navbar
    session={session}
    owner={owner}
    room={room}
    isRoom
    isLoadingRoom={isLoading}
    participantCount={participantCount}
  />

  <div
    className='relative w-full h-full'
    style={{
      background: "linear-gradient(45deg, #03A9F4, #4CAF50)",
    }}
  >
    {isLoading ? (
      <div className='flex justify-center items-center h-screen text-white'>
        <p>One moment. Please...</p>
      </div>
    ) : (
      <div className='w-full flex flex-col-reverse xl:flex-row'>
        <BoardContainer room={room} />
        <section className='min-w-[15rem] max-w-[15rem] xl:min-h-0 relative mx-auto flex items-center xl:flex-col gap-3 text-white'>
          <VideoWrapper userData={user} callId={room?.id}>
            <VideoLayout setParticipantCount={setParticipantCount} />
          </VideoWrapper>
        </section>
      </div>
    )}
  </div>
</main>
Your [roomId].tsx file should look something like the below:
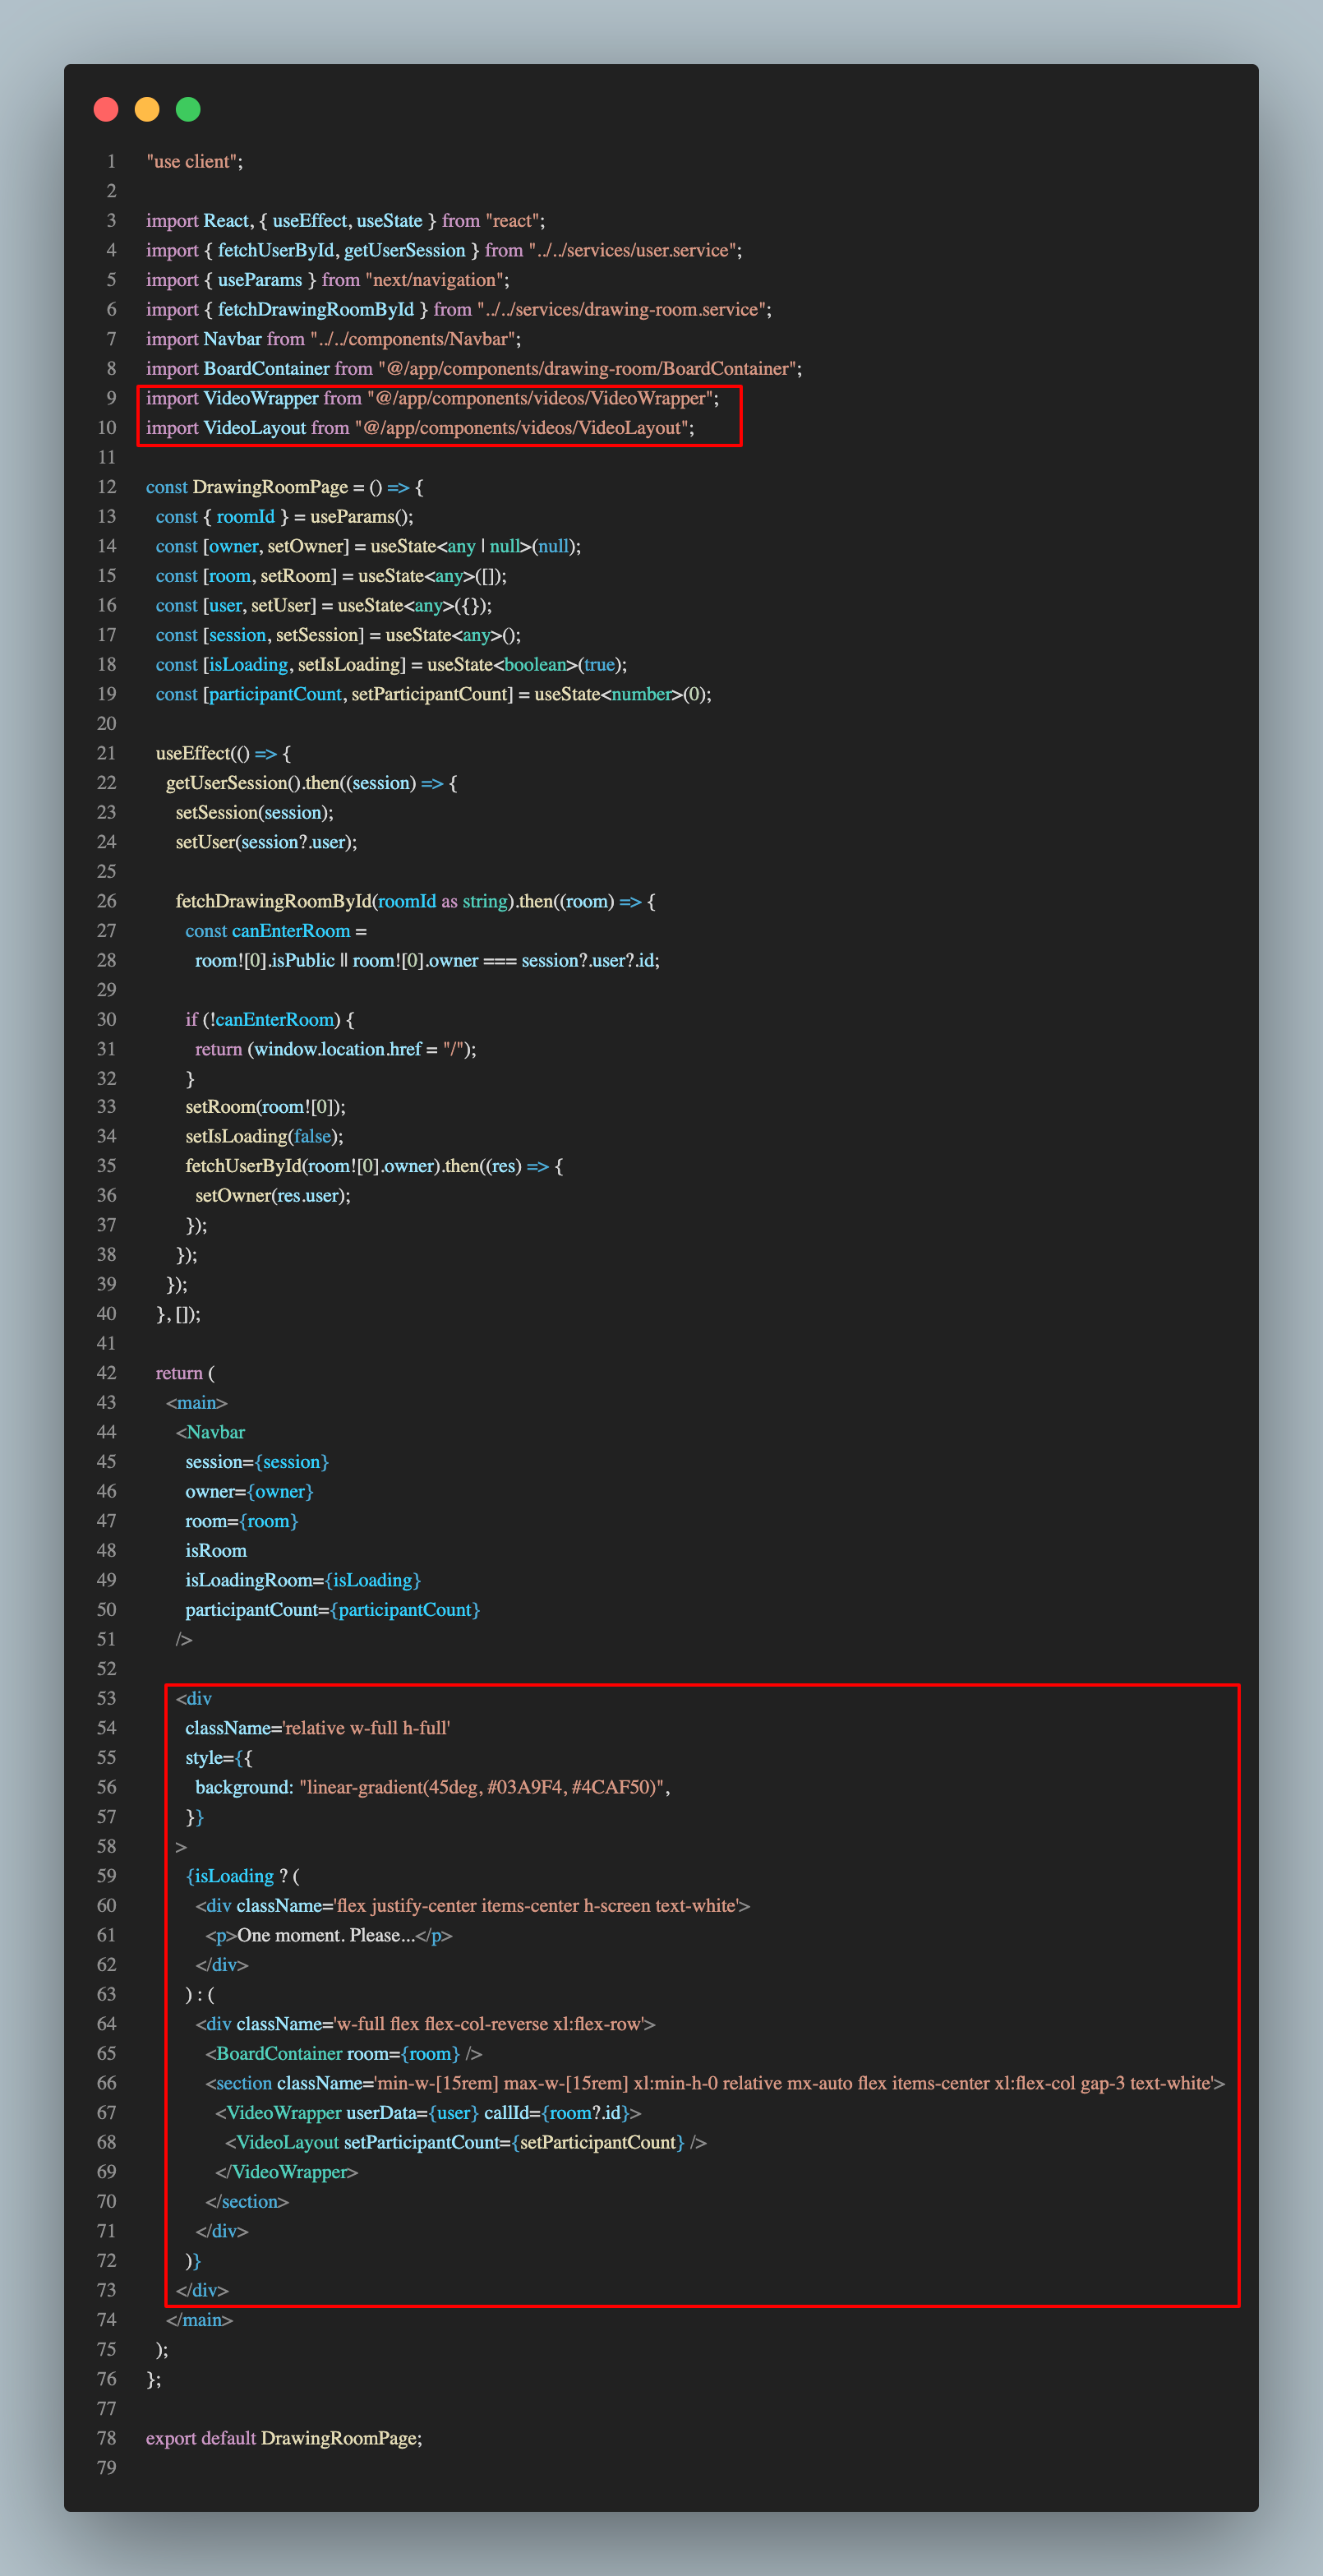
From the code above, we're displaying a loading message while the user session is been fetched using the isLoading state because we only want to render the video components when there is a user session.
When you create a new room or visit any room you've created, you should see the video feature working as shown below.
PS: If you encounter any duplicate video issue or mismatch in the participant count on the navbar, please visit the 'Debugging Tip' section in the article for the fix.
Finally, join the drawing room with another account, and ensure the room visibility is public, you should see both the video and cursor from each of the participating accounts as shown below:
Hooray 🥳
Our application feature is now fully implemented. You're a rock star for making it this far!
Didn't Work? Debugging Tips
Below are some debugging tips to fix any known issue you might encounter while following this tutorial. You can leave a comment or raise an issue from this repository.
A. Seeing "Invalid Supbase API Key" from the broadcast network?
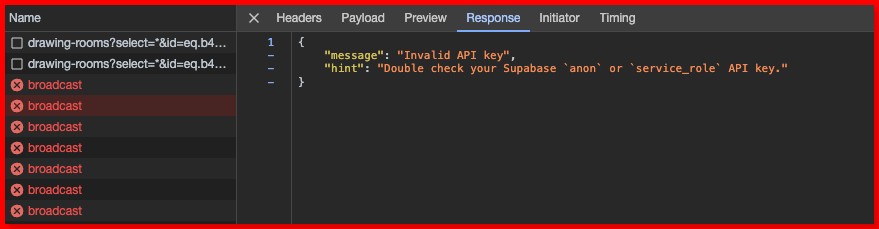
Confirm that your API keys are correct and If you're certain that your API keys are correct, then it's probably your network connection.
B.Doubled participant counts and video screens
If you observe that the participant counts are been doubled and you see your participants' videos have been duplicated as shown below.
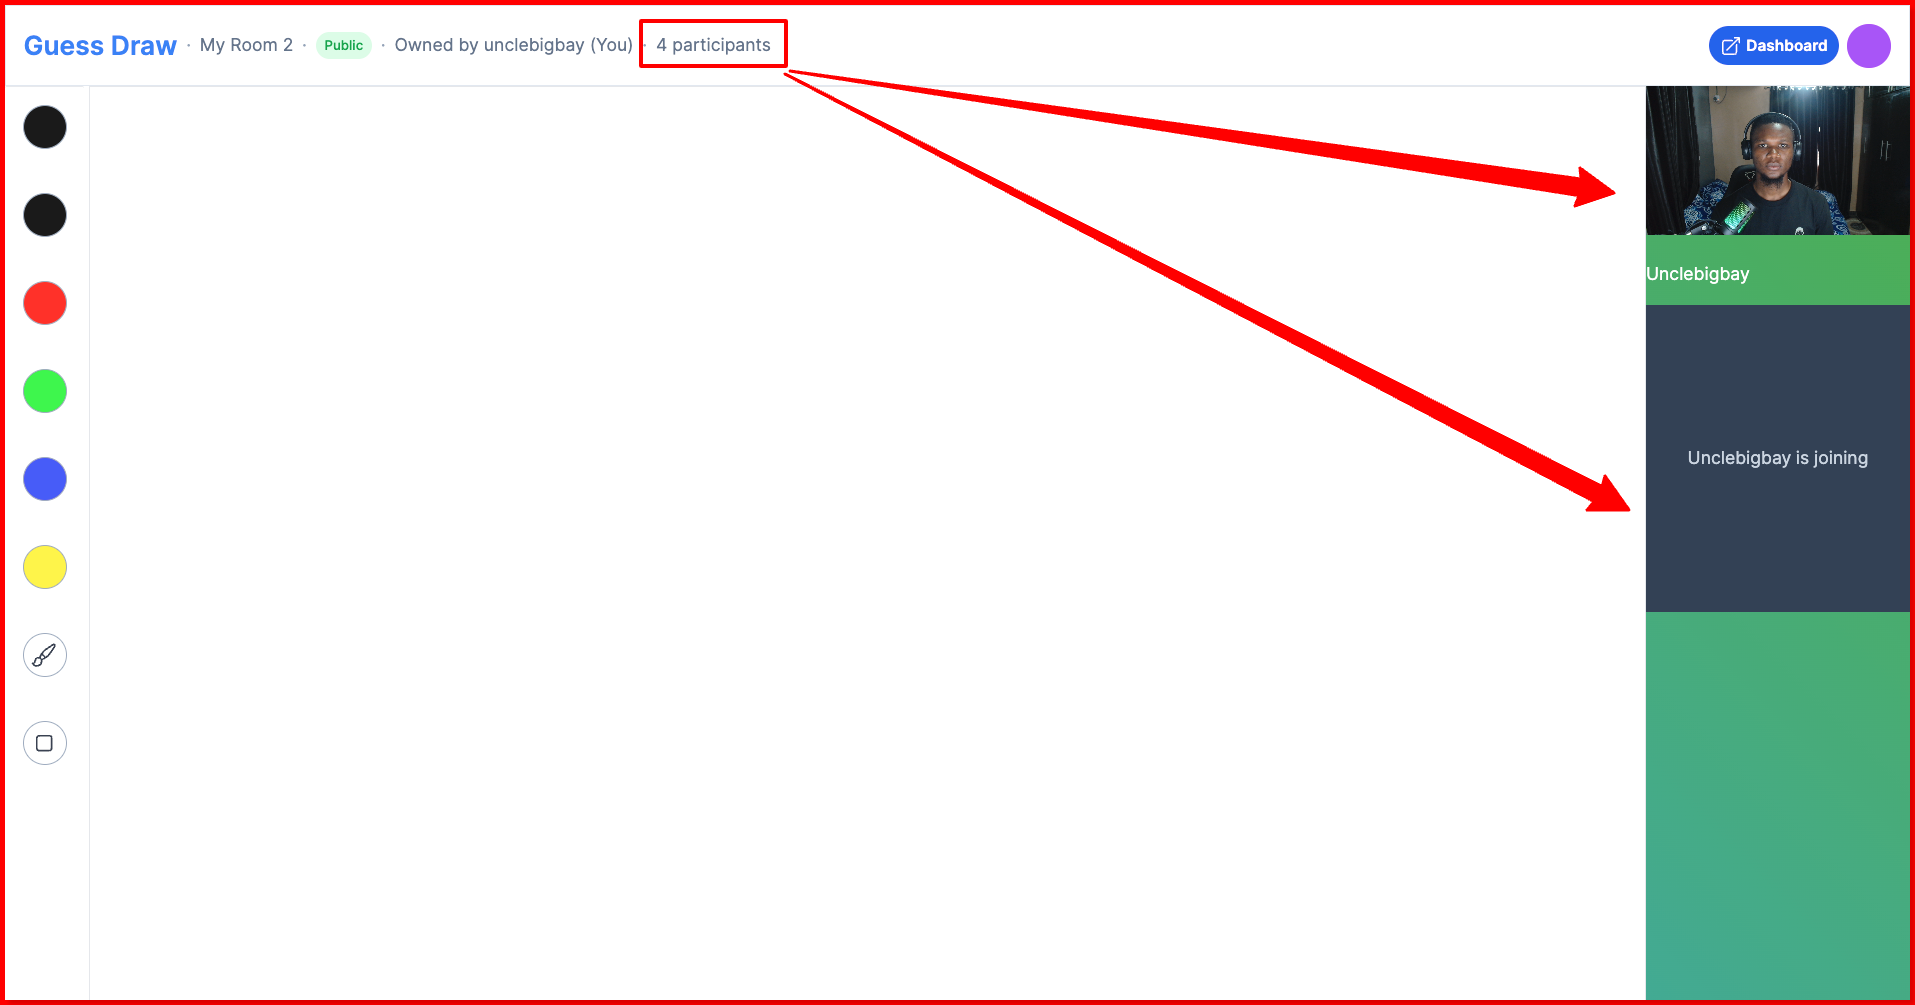
The possible cause is due to the NextJS strict mode which renders the component twice, you should notice this from the "Building the Navbar" section where we logged the user session in the browser console.
To fix this, set the reactStrictMode to false in your next.config.js as shown below:
/** @type {import('next').NextConfig} */
const nextConfig = {
    reactStrictMode: false,
};

module.exports = nextConfig;
Wrapping Up
In conclusion, building a real-time collaborative whiteboard with video capabilities is achievable using NextJS, Supabase, and Stream Video SDKs. By leveraging these powerful tools, you can create an interactive and engaging platform for users to collaborate, draw, and communicate in real-time.
This tutorial demonstrated how to set up the necessary infrastructure, backend services, and frontend components, paving the way for you to further build, customize, and enhance the real-time video application to suit your needs.
What's Next?
Now that we're done building a collaborative whiteboard application with a video feature and live presence together, there are a couple of features you can include in the application itself for further self-learning.
Add a
deletedrawing room functionality to the application.Add an
updatedrawing room functionality to update the name and visibility of a room.Use an advanced whiteboard such as Excalidraw and Tldraw.
Cheers, and keep coding! 🎉
Enjoyed this article?
Subscribe to my YouTube channel for coding tutorials, live project builds, and tech discussions.
Subscribe